A weld joint is where you join metal parts so the repair stays strong and aligned in auto body work. You’ll use butt joints for panel seams, lap joints for fast overlaps, tee joints for frames and brackets, and corner joints for boxed sections. Joint choice affects load paths, distortion, and durability. Clean fit-up, proper prep, and controlled heat help you avoid defects, and the details behind each joint type can make your welds much better.
What Is a Weld Joint in Auto Body?
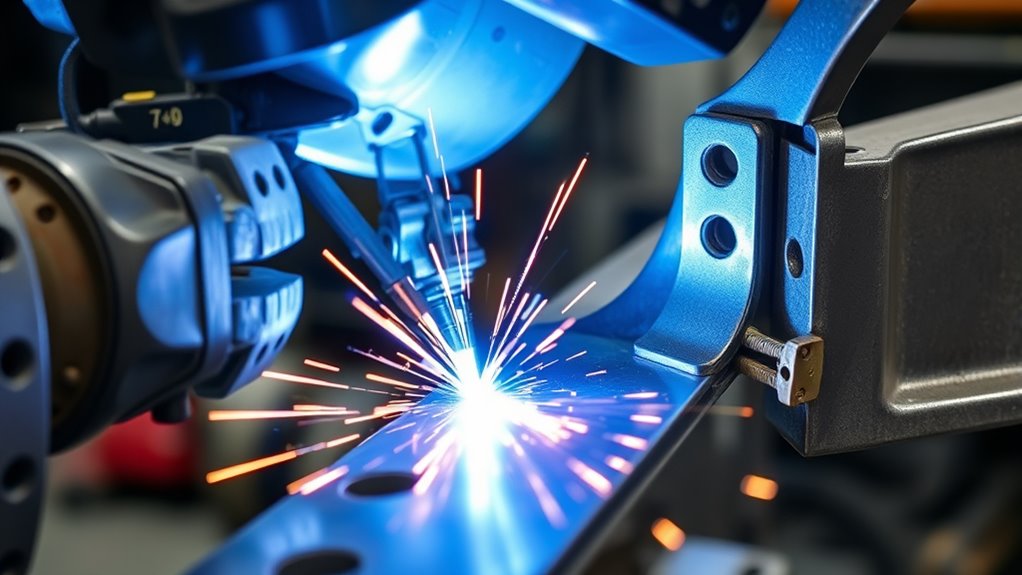
A weld joint in auto body is the connection you create between metal parts to restore or maintain a vehicle’s structural integrity and strength. You use it when you need to rebuild frames, panels, or support sections after damage.
The joint must match the load path, metal thickness, and fit-up, so you can keep the structure stable and safe. In practice, you work with weld joint materials that suit the repair metal, then choose weld joint processes that control heat and penetration.
Butt joints join flat sections edge to edge and need exact alignment. Lap joints overlap sheets for faster assembly and solid strength in hidden areas. T-joints connect parts at right angles, helping support frames and braces. Understanding the welding techniques used for different joint types ensures effective repairs.
When you understand the joint’s purpose, you can make precise repairs that return control, durability, and function to the vehicle.
Why Weld Joint Design Matters in Auto Body
You control load paths through weld joint design, and that directly affects how the repair carries crash and service forces.
You also need tight fit-up and alignment to limit distortion, weak fusion, and defects like burn-through or cracking.
Choosing the right joint for the load, material, and weld process helps you get a stronger, more durable auto body repair. Additionally, understanding protective clothing is essential to ensure safety while performing these repairs.
Load Path Control
In auto body work, weld joint design matters because it controls the load path and determines how stress moves through the structure under real driving loads.
You shape load distribution by choosing the right joint for the force, whether it’s a T-joint, lap joint, or another configuration. That choice affects how the body carries torsion, shear, and bending without overloading one spot.
Smart joint reinforcement strengthens critical areas and helps you avoid stress concentration, cracking, and premature failure in chassis and suspension zones.
When you understand load paths, you can match welding technique and material to the job, so the structure works with the forces instead of fighting them.
That’s how you build safer, tougher, and more resilient vehicles.
Fit-Up And Alignment
Even the best weld joint design won’t perform as intended if fit-up and alignment are off, because proper positioning is what lets the weld form strong, consistent fusion and preserve structural integrity.
You need tight fit-up, clean edges, and disciplined alignment techniques before you strike an arc. Poor positioning invites warping, distortion, and weak spots that can ruin both appearance and function.
- Use jigs and fixtures to lock parts in place.
- Verify gaps, edge prep, and panel flushness.
- Recheck alignment before final weld passes.
Good fixture design helps you control complex assemblies and keep multiple joints true.
When you set parts accurately, you spread load more evenly and reduce stress concentrations, so your repair lasts.
Joint Choice Matters
You need joint selection that matches the panel geometry, stress path, and material compatibility, or you’ll invite failure.
Use butt joints for flat panels when you need clean alignment and strong penetration; bevel the edges to improve fusion in high-stress zones.
Choose T-joints for frame connections where loads intersect and must move through the structure.
Lap joints help you join different thicknesses while keeping fit and finish under control.
When you understand each joint’s behavior, you distribute stress more evenly, reduce warping, and cut the risk of cracking.
That’s how you build repairs that hold up and stay free.
Butt Joints for Auto Body Panels
Butt joints are one of the most common ways to join auto body panels because they create a clean, seamless connection that supports both strength and appearance. You align two panels in the same plane, so you keep the surface flat and ready for finishing. For butt joint applications, this matters when you need tight fits on exterior skins, repair patches, and replacement sections.
- Square grooves suit thin sheet metal.
- Beveled edges improve penetration on heavier material.
- Clean, shaped edges help prevent burn-through.
You’ll get the best butt joint advantages when you prep the edges carefully, remove contamination, and control heat. MIG, TIG, or stick welding can work, depending on the metal and repair demands. Additionally, understanding the maximum fillet weld size for the thickness of your materials ensures strong joints without excess heat input.
If you want a durable, liberated repair that looks factory-clean, this joint gives you the control to make it happen without excess filler or ugly overlap.
Products Worth Considering
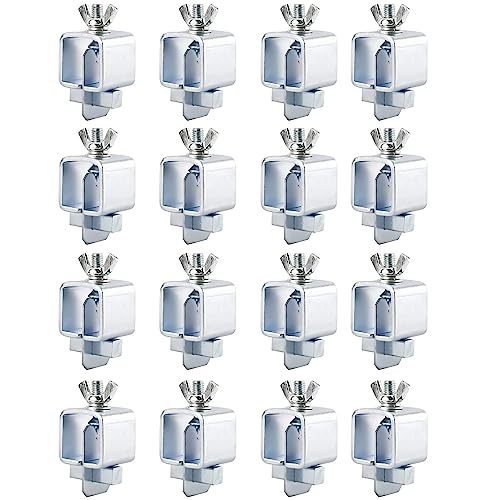
Butt Welding Clamps includes 16 welding corner square welder clamps; Used to make precision butt welds and edge-to-edge welds for patch repairs in floors, wings, door skins, fabricating, and re-skinning projects

【Product Purpose】Butt welding clamps set includes 16 welding corner square welder clamps, which can be used to make precision butt welds and edge-to-edge welds for patch repairs in floors, wings, door skins, fabricating, and re-skinning projects. They are good accessories to help you to find the location quickly in repair work.

Value Pack: The package includes 24 packs of butt welding clamps, enough quantity to meet your daily needs and replacements. Each butt welding clamps is individually wrapped in a small bag, convenient to carry and use.
Tee Joints for Frames and Brackets
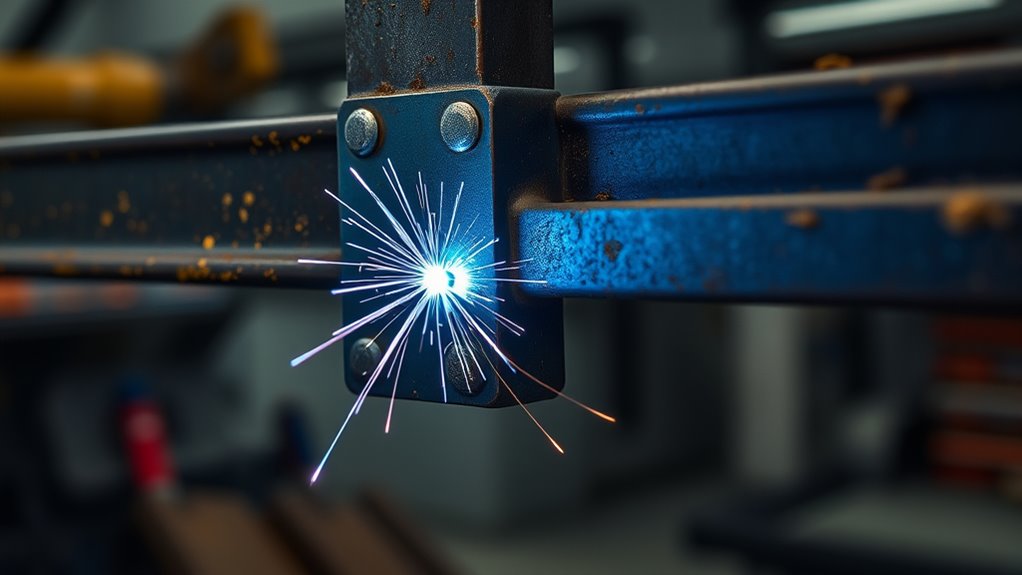
Tee joints take you from flush panel work to structural connection, where two pieces of metal meet at a 90-degree angle to form a strong T shape. You’ll use them in frames and brackets when you need stiffness, load support, and clean transfer of force.
Their tee joint advantages include high rigidity, dependable alignment, and strong resistance to movement when you weld them correctly. In tee joint applications, fillet welds are common because they give solid penetration and practical strength.
Prep the edges carefully, especially on thicker stock, so you don’t trap weak spots or create stress concentrations. When stress hits from more than one direction, welding both sides boosts durability and helps the joint hold under real-world road loads.
You can rely on tee joints to connect support beams and bracket arms, giving your build the stability it needs to stay free, functional, and road-ready. Additionally, understanding welding techniques for cast iron is crucial for ensuring the integrity of these joints in high-stress applications.
Products Worth Considering
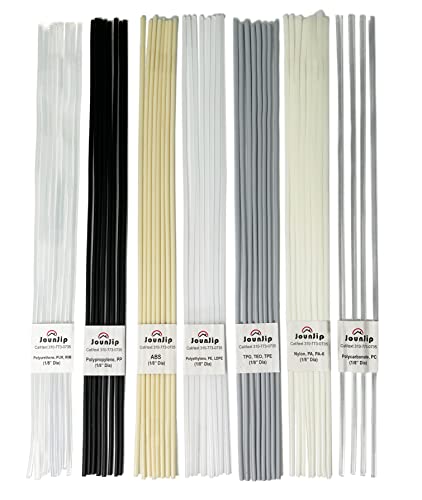
7 Different Plastic Types- Covers the 7 most used plastics- Polypropylene, Polyurethene, ABS, Polyethelene, TPO, Nylon, and Polycarbonate, 13" long, 1/8" in diameter, 52 pc set

Comprehensive Welding Package: our package comes with 12 low temperature universal welding rods available to meet your welding requirements; Whether you are a novice or an experienced welder, this kit of welding rods ensures you have things you need for your welding projects; Material is relatively brittle, received with breakage is a normal phenomenon, does not affect the use
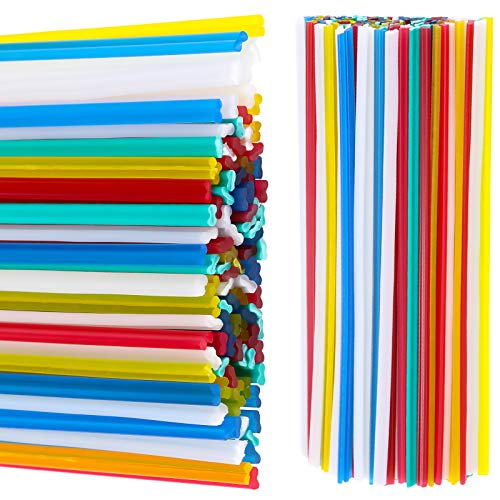
Package includes: you will get 100 pieces of plastic welding rods in various colors, such as green, blue, yellow, red and white, 20 pieces for each color; Sufficient quantity and styles can meet your multiple demands
Corner Joints for Boxed Structures
When you build boxed structures, you need precise box frame alignment so the corners stay square and the assembly doesn’t twist.
You can use fillet welds or other corner weld techniques, and good fit-up with jigs helps you hold position during welding.
Weld both sides when possible to boost strength in the enclosure and reduce failure under load. Additionally, ensuring proper surface preparation can significantly enhance the quality and strength of your welds.
Box Frame Alignment
Corner joints are critical for aligning box frames in auto body work because they lock two metal sections together at right angles and add strength where the structure needs it most.
You need corner joint stability to keep chassis rails true under load, and smart alignment techniques to stop twist before it starts.
- Use jigs to hold each section square.
- Check fit-up before you commit heat.
- Confirm both faces stay flush and even.
When you set the frame correctly, you protect structural integrity and reduce rework.
Boxed structures take dynamic forces on the road, so your alignment must stay precise from tack to finish.
With clean layout and steady control, you build a rigid frame that supports safer, freer movement down the line.
Corner Weld Techniques
Boxed joints demand precise weld technique because they lock metal sections together at right angles and keep the structure stable under load.
You’ll use corner joint design to build frames, enclosures, and support structures in auto body and industrial work.
Choose welding techniques based on thickness: fillet welds work well for quick external seams, while groove welds help you reach deeper fusion on heavier material.
Prep both edges, align them tightly, and hold fit-up steady so you get full penetration without burn-through or distortion.
Control heat input with short, even passes and let the joint cool as needed. That way, you keep the corner clean, accurate, and ready for service without wasting material or losing control.
Strength In Enclosures
Reinforced enclosures rely on corner joints to lock panels at right angles and keep boxed structures rigid under load. You use them in frames, housings, and other corner joint applications where shear and torsion try to twist the assembly.
- Minimal edge prep speeds fit-up and cuts waste.
- Fillet or groove welds help you control strength and reduce lamellar tearing.
- MIG or TIG lets you match the process to thickness and finish needs.
Choose corner joint materials that weld cleanly and carry load without distortion. When you set the joint correctly and weld with care, you get a stiff enclosure that holds shape, supports hardware, and frees the structure from flex that weakens performance.
Lap Joints in Sheet Metal Repair
Lap joints are one of the most practical options in sheet metal repair because you overlap two pieces of metal to create a strong connection that handles different thicknesses well. You’ll use them often on body panels because they spread load and reduce stress concentration, which helps the repair stay stable. The lap joint advantages include simple fit-up, good strength, and flexible welding access. The lap joint disadvantages include added material buildup and a greater need for corrosion control. Additionally, achieving the right MIG welding settings is crucial for ensuring a strong and durable weld.
| Step | Purpose |
|---|---|
| Prepare edges | Clean, straighten, and align for solid penetration |
| Weld overlap | Run a fillet weld with MIG, TIG, or stick |
| Reinforce both sides | Improve strength when access allows |
You should keep the overlap tight and weld both sides when you can. That approach boosts integrity, limits lamellar tearing risk, and supports a clean, durable repair.
Edge Joints for Clean Panel Seams
When you use an edge joint, you align two sheet-metal edges so you can weld a tight seam with minimal overlap.
You’ll see this joint in auto body panel work when you need a smooth, flush finish for appearance and airflow.
Good fit-up, clean edges, and controlled MIG or TIG heat help you avoid gaps, burn-through, and weak seams.
Edge Joint Basics
Edge joints line up two metal pieces along their edges, making them a practical choice when you need a clean seam in auto body panel repair or fabrication. You use them most in sheet metal work when you want a flush finish and tight visual control.
- Clean, straight seam for visible panels
- Easy to fit after accurate edge prep
- Best when appearance matters more than load
Prep both edges by cleaning, and groove them if needed for better penetration. Keep heat input low so you don’t burn through thin sheet.
The edge joint advantages are simple: fast alignment, smooth finish, and solid cosmetic results. The edge joint limitations are just as clear: lower strength and poor fit for high-stress areas.
Use them when you want precision, not brute force.
Panel Seam Applications
For clean panel seams in auto body work, you’ll often use edge joints where two sheet metal pieces meet along their edges for a smooth, low-visibility weld. You choose them because they improve fit-up, cut visible seams, and support edge joint benefits in lightweight body panels. Their edge joint applications work best on thin sheet metal when you control heat and travel speed.
| Task | Why it matters | Result |
|---|---|---|
| Prep edges | Tight fit | Less gap |
| Align panels | Uniform seam | Cleaner weld |
| Control heat | Avoid warp | Strong panel |
You still need accurate edge preparation to keep corrosion from starting in open gaps. Hold steady motion, and you’ll preserve panel integrity without burn-through.
Clean Finish Techniques
A clean edge-joint seam starts with tight edge prep and accurate alignment, so the panels meet without visible gaps. Use cleaning techniques that remove coating, oxide, and oil, then apply alignment tips to hold the edges flush before you weld.
Edge joints give you smooth shifts, and a U-groove or V-groove can help you drive penetration while keeping the seam discreet.
- Clamp the panels firmly to stop shift.
- Set heat low enough to avoid burn-through.
- Grind or polish the weld after cooling.
You’ll get a stronger joint and a cleaner finish when you control heat input and finish the seam with post-weld refinement. That lets your repair look intentional, precise, and free.
How to Choose the Right Weld Joint
Choosing the right weld joint starts with matching the joint to the material thickness and the load it’ll carry. You also need to weigh weld joint materials and joint configuration techniques so the connection works with the part, not against it. Butt joints suit stock over 1/8-inch thick when you need a strong, seamless bond. T-joints handle right-angle loads in frames and supports. Corner joints work well on sheet metal because they’re quick to assemble and need little edge work. Lap joints help when thickness differs, especially in body panels. Edge joints fit low-stress seams only. Using the appropriate weld joint type can significantly enhance weld quality and overall structural integrity.
| Joint | Best Use | Strength |
|---|---|---|
| Butt | Thick material | High |
| T | Frames/supports | Good |
| Corner | Sheet metal | Moderate |
| Lap | Uneven thickness | Strong at overlap |
| Edge | Low stress | Low |
Pick the joint that matches your structure, and you’ll build safer, cleaner, more autonomous repairs.
How to Prep Weld Joints for Better Results
Clean metal and solid fit-up are the foundation of a good weld, because rust, oil, and other contaminants can trap porosity and weaken fusion. For reliable weld joint preparation, start with thorough surface cleaning: grind, wipe, or chemically clean each edge until bare, bright metal shows.
Then check alignment so the parts meet with tight, even contact and won’t shift under heat.
- Bevel or groove thicker sections to improve penetration.
- Use jigs or fixtures to lock complex panels in position.
- Preheat heavy or high-carbon steel when the material needs it.
This approach helps you control distortion, reduce stress, and build stronger joints with less rework. Additionally, ensure that all zinc residues are removed to prevent weld contamination and achieve optimal fusion.
When you prep the joint right, you’re setting the stage for clean fusion and a durable repair that holds up in real-world service.
Common Weld Mistakes to Avoid
Even a solid weld can fail if you rush the setup or the bead. In common welding, the first mistake is poor fit-up: gaps and misalignment force you to chase the joint instead of joining it cleanly.
A solid weld can fail when poor fit-up leaves gaps and misalignment to fight instead of a clean joint.
For butt joints, skip edge prep and you risk burn-through or incomplete penetration, and that weak seam can crack under load. Use the right filler for the base metal, or you’ll get poor fusion and a joint that’s easier to fracture.
Keep your travel speed steady; too fast leaves thin beads, too slow adds heat and invites porosity or undercut. Watch temperature, too. Overheating can warp panels and distort the structure, which can throw off alignment across the body. Proper shielding gas selection is also crucial for ensuring clean welds and preventing defects.
Good weld safety means planning each pass, checking contact points, and correcting mistakes before the arc starts. When you control setup, heat, and filler choice, you weld with precision and keep the vehicle’s structure strong, direct, and free.
Frequently Asked Questions
What Are the Four Types of Weld Joints?
The four main weld joint types are butt, tee, lap, and corner joints. You choose joint design based on load, fit-up, and access, so you can weld stronger, cleaner automotive parts efficiently.
What Is the Most Common Used Weld Joint?
The most common weld joint is the T-joint, a powerhouse that seems to hold entire worlds together. You’ll see it dominate weld joint types and weld joint applications, especially in auto body frames and structural members.
Conclusion
In auto body work, choosing the right weld joint can make or break your repair. Butt, tee, corner, and edge joints each serve a specific job, from panel seams to structural frames. Here’s the key takeaway: studies show welding defects account for up to 30% of fabrication rework, so joint prep matters. If you fit, clean, and align each joint carefully, you’ll get stronger welds, cleaner finishes, and fewer costly mistakes.


