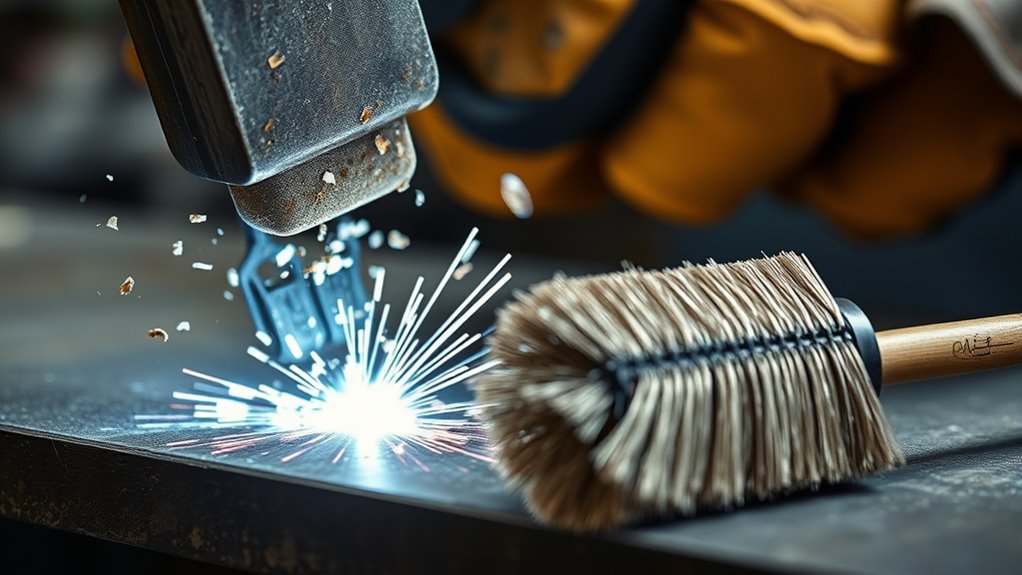
After flux-cored welding, use a chipping hammer to remove slag effectively. Hold it at a shallow angle and apply short taps to prevent damage to the weld. Once the slag’s dislodged, inspect the weld for impurities. Follow up with a wire brush at a 45-degree angle for thorough cleaning. Remember to maintain both tools for peak performance. With these techniques, you’ll achieve a clean, solid weld, and tips on avoiding common mistakes await you next.
How to Use a Chipping Hammer in Flux-Cored Welding
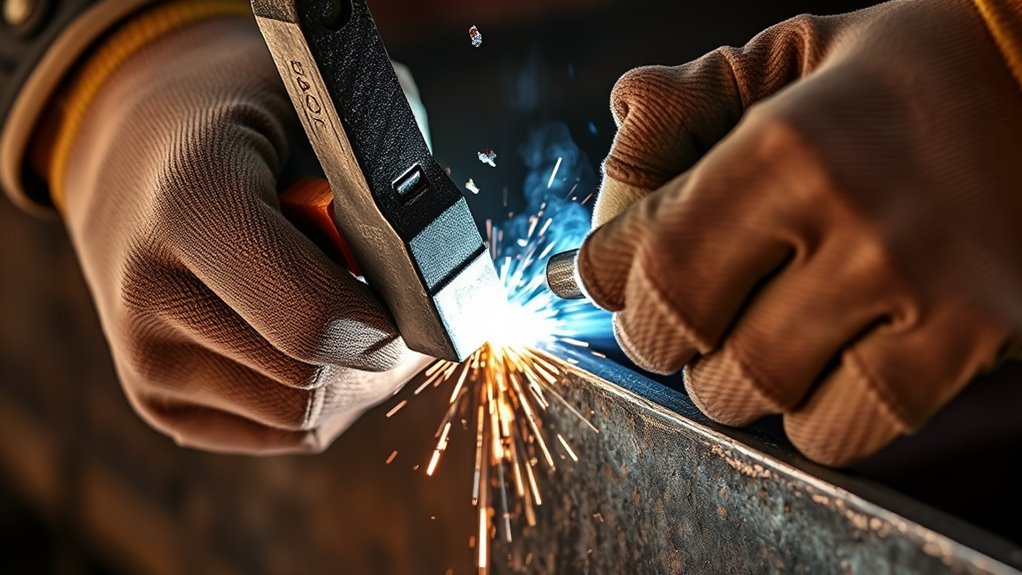
Using a chipping hammer effectively in flux-cored welding is vital for ensuring a clean weld. Hold the chipping hammer firmly with both hands, positioning the pointed end at a 90-degree angle to the slag surface. This angle maximizes your ability to remove slag efficiently.
Instead of heavy strikes, use short, controlled taps to prevent damaging the weld bead, focusing on small sections for best results. Timing is essential—remove slag while it’s still warm, as this makes the process considerably easier than dealing with cooled, hardened slag.
Choose the right type of hammer: a straight peen is ideal for tight corners, while a cross peen works best on wider beads. Additionally, understanding flux core welding techniques can help you achieve cleaner and more consistent welds.
Always prioritize safety by wearing heat-resistant gloves and safety goggles to shield yourself from flying debris and sharp slag particles during the chipping process.
Products Worth Considering

VERSATILE DESIGN - Equipped with a 7/8" wide chisel side for chipping away weld slag and a pointed side for precision work and detailed clean-up, making it a perfect for welding and metalworking.

High carbon steel chipping hammer for maximum strength,10-1/2-Inch overall length.
What Safety Gear Do You Need for Chipping and Cleaning?
When you’re chipping and cleaning, wearing the right safety gear is essential.
Start with heat-resistant gloves and safety goggles to protect against sharp edges and flying debris.
Don’t forget ear protection and flame-resistant clothing to mitigate noise and burn risks while ensuring proper ventilation in your workspace. Additionally, consider using respiratory protection to guard against harmful dust particles generated during the chipping process.
Essential Safety Gear
To guarantee your safety while chipping and cleaning, it’s crucial to wear the appropriate gear. Start with heat-resistant gloves to protect your hands from hot slag and sharp metal fragments.
Don’t forget safety goggles; they shield your eyes from flying debris and dust created when using a chipping hammer or wire brush to remove contaminants.
Hearing protection, like earplugs or earmuffs, is important, especially with pneumatic tools. A respirator or dust mask minimizes harmful dust inhalation during cleanup.
Finally, choose flame-resistant clothing to safeguard your skin from sparks and heat.
Proper Protective Equipment
After ensuring you’ve got the right safety gear on, it’s time to focus on the specific protective equipment needed for chipping and cleaning tasks. This gear not only protects the weld but also safeguards your health.
| Equipment | Purpose | Importance |
|---|---|---|
| Safety Goggles | Protects eyes from debris and sparks | Essential for vision safety |
| Heat-Resistant Gloves | Prevents burns from hot metal and slag | Critical for hand protection |
| Dust Mask/Respirator | Minimizes inhalation of harmful particles | Crucial for respiratory health |
Always wear flame-resistant clothing to shield your skin from burns and sparks. If you’re using pneumatic tools, don hearing protection to preserve your hearing. Stay safe and focused during your tasks!
Cooling the Weld and Inspecting for Slag
After welding, let the weld cool to a manageable temperature to prevent damage when using the chipping hammer. Conduct a thorough visual inspection to identify any slag residue or imperfections that may indicate issues with your technique. Spotting and addressing these flaws early is essential for maintaining the integrity of your weld. Additionally, ensure the workpieces are cleaned properly to prevent arc sputtering, which can lead to more slag formation.
Proper Cooling Techniques
Cooling the weld properly is essential for guaranteeing its integrity and preparing it for cleaning. Allow at least 5-10 minutes for the weld to cool before handling it. This prevents damage to the weld bead and guarantees safety during the cleaning process.
Once cooled, visually inspect the weld for any visible slag or irregularities. Before reaching for the chipping hammer, confirm that the surface is suitable for cleaning.
Use the chipping hammer to break up any hardened slag by applying controlled, light taps. This technique minimizes the risk of damaging the weld.
After chipping, follow up with a wire brush to remove residual slag, smoothing the weld surface for better inspection and further welding if necessary.
2. Visual Inspection Methods
Once the weld has cooled to a manageable temperature, it’s time to conduct a thorough visual inspection.
Begin by checking for visible slag residue that could compromise weld integrity. You’ll want to guarantee the surface is free of impurities. If you spot any hardened slag, grab your chipping hammer and apply short, controlled taps to dislodge it, being careful not to damage the weld bead.
After using the chipping hammer, take a wire brush to further clean the weld surface, removing any remaining slag flakes.
During your visual inspection, regularly assess the bead’s uniformity and consistency in width to guarantee quality craftsmanship.
This careful process lays the groundwork for a reliable and strong weld.
3. Identifying Slag Residue
It’s crucial to let the weld cool adequately before you start inspecting for slag residue. Rushing this step can lead to burns and an inaccurate assessment.
Look for a crusty layer on the weld’s surface; that’s the slag residue you want to remove. Use a chipping hammer to gently break it up, applying short, controlled taps to avoid damaging the underlying weld.
After breaking the slag, inspect the weld closely for any remaining impurities, as trapped slag can weaken the joint. Once you’ve cleared the bulk of the residue, take a wire brush to thoroughly clean the weld area, ensuring peak integrity.
Regular inspection and cleaning will enhance your welding quality and performance in the long run.
Chipping Hammer Techniques for Effective Slag Removal
To achieve effective slag removal, hold the chipping hammer at a shallow angle to the weld surface. This technique helps break up slag without damaging the weld bead. Use short, controlled taps with the pointed pick end to dislodge hardened slag, working in small sections for efficiency. Once you’ve removed the larger pieces, switch to the flat chisel end to scrape away residual flakes and smooth the surface.
Perform slag removal while it’s still warm; this makes it easier to chip away compared to cooled slag. Regularly inspect and maintain your chipping hammer, confirming the ends are sharp and the tool is clean for peak performance. Additionally, ensure proper electrode settings to minimize excess slag formation during the welding process.
| Technique | Description | Effectiveness |
|---|---|---|
| Shallow Angle | Prevents weld damage | High |
| Short Taps | Controls force and precision | Medium |
| Warm Slag Removal | Eases dislodging | Very High |
| Flat Chisel Scrape | Smooths surface | High |
| Regular Maintenance | Confirms tool effectiveness | Critical |
Products Worth Considering

Wide Range of Application - XtremepowerUS demolition hammer gains itself good fame in demolition, chipping, trenching, breaking holes in concrete, block, brick, tile stucco, etc. You may find it applicable for various situations by its versatility, such as plumbing, mechanical installation, construction of water supply and drainage facilities, interior decoration, port facilities' construction, and other construction projects
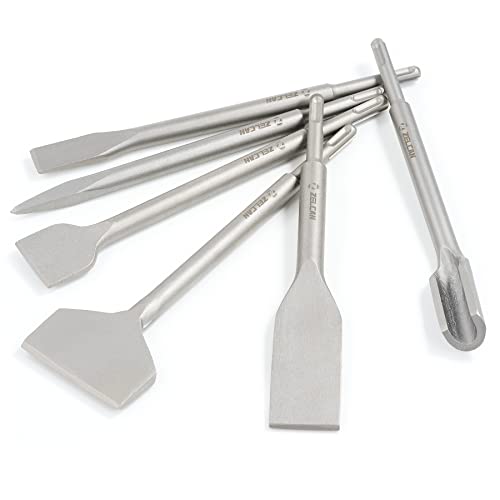
ALL-IN-ONE KIT: This multifunctional 6 piece chisel set by Zelcan includes a tile chisel, grooving chisel, scrapping chisel, flat chisel, point chisel, and scaling chisel, so you can work on any material from ceramic tile to concrete, brick, and masonry to real and artificial stone, including granite

Universal compatible fit most demolition hammers and some jack hammers for convenience with a hex 1-1/8" shank. Connect demolition hammer drill is apply to any kinds of breaking up concrete, wall tiles, cement walls, stone, etc.
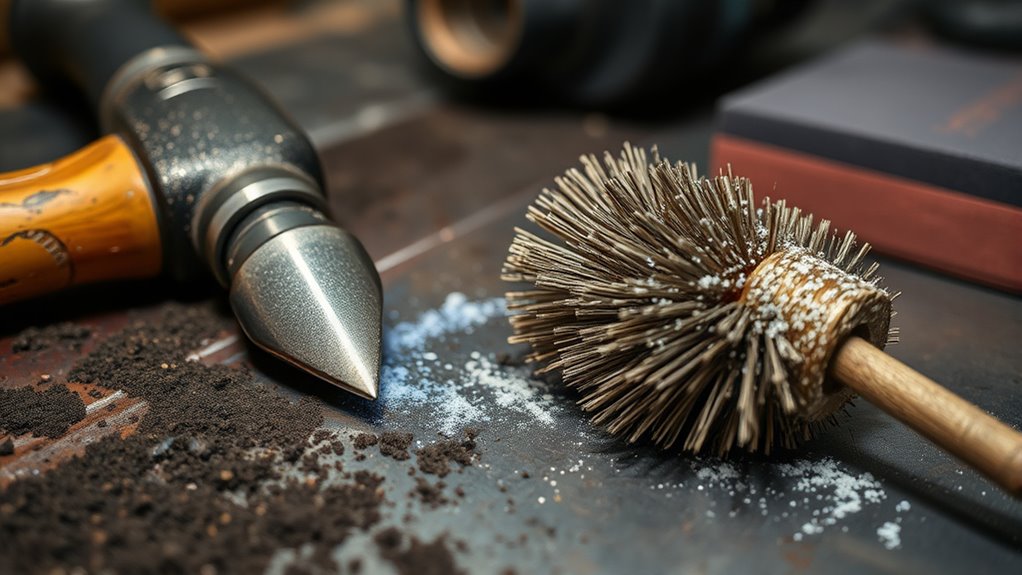
Using a Wire Brush for Maximum Efficiency After Chipping
After effectively removing slag with a chipping hammer, using a wire brush guarantees a polished weld surface ready for inspection.
Choose a handheld wire brush or a grinder with wire brush attachments to tackle any debris left behind, especially in hard-to-reach areas.
For peak efficiency, select a wire brush with bristle stiffness suited to your metal type; softer brushes work well on delicate surfaces, while stiffer ones excel at removing tougher slag.
Employ a circular motion with the wire brush to quickly cover larger areas, guaranteeing even cleaning without damaging the underlying weld bead.
Remember to clean the wire brush regularly to prevent transferring contaminants back onto the weld and to maintain superior cleaning performance. Utilizing the correct wire wheel type ensures optimal rust removal and surface preparation.
This attention to detail guarantees a high-quality finish, ultimately leading to successful inspections and a liberated welding process.
Common Cleaning Mistakes to Avoid
What common pitfalls should you watch out for when cleaning your welds? First, avoid using excessive force with your chipping hammer. Too much pressure can damage the weld bead and create micro-cracks, undermining weld integrity.
Next, clean the surface immediately after welding while the slag is still warm. This makes removal easier and prevents contaminants from being trapped.
When using a wire brush, maintain a 45-degree angle for maximum effectiveness; this technique sweeps away residual slag without disturbing the weld.
Don’t overlook the importance of thorough inspection. Good lighting can help you spot missed areas that need additional cleaning.
Additionally, ensure your cleaning process accounts for proper joint preparation, as contaminants can lead to issues like worm tracks in your welds.
Finally, regularly inspect your cleaning tools. Replace worn brushes or damaged hammers to guarantee they perform at their best.
Maintaining Your Chipping Hammer for Longevity
Maintaining your chipping hammer is key to ensuring it performs effectively and lasts longer. Start by regularly inspecting the hammer for signs of wear, like chipped or damaged points; replace them as needed for optimal slag removal.
After each use, clean and dry the hammer to prevent rust, which can compromise its integrity and performance. Periodically sharpen both the pointed and flat ends to enhance their effectiveness in breaking and scraping slag from welds.
Regularly clean and dry your chipping hammer to prevent rust, and sharpen its ends for optimal slag removal.
Check that the handle is securely attached and free of cracks or splinters—replace it if necessary to maintain safety and comfort during use. Additionally, ensure that the hammer is stored in a well-ventilated area to avoid wire quality issues that could impact its performance.
Finally, store your chipping hammer in a dry place, ideally in a protective case or hanging hook, to prevent damage and prolong its lifespan.
Alternative Cleaning Tools to Consider
While a chipping hammer and wire brush are essential for cleaning welds, exploring alternative tools can greatly enhance your efficiency and results.
For larger or tougher jobs, consider using an angle grinder equipped with a wire wheel. This powerful tool considerably reduces cleanup time, allowing you to tackle larger areas with ease. Additionally, using the correct wheel types can improve your grinding performance and finish quality.
If you’re dealing with heavy slag, a needle gun can be your best friend; its rapid, concentrated strikes effectively break up stubborn deposits, making your job much smoother.
Cup brushes mounted on angle grinders are excellent for achieving a finer finish after initial slag removal, enhancing the weld’s appearance.
Additionally, scrapers can provide extra mechanical leverage for lifting off thick deposits before using a chipping hammer or wire brush.
Final Touches for a Clean Weld Surface
After using alternative cleaning tools, it’s time to focus on the final touches for a clean weld surface. Start by using your chipping hammer to break up any thick slag on the weld, enhancing its integrity.
While the slag is still warm, grab your wire brush to scrub away any remaining flakes. This dual approach not only cleans but also polishes the weld area effectively.
Here’s what you should do:
- Use the pointed end of the chipping hammer for tight spots.
- Utilize the flat end for larger slag pieces.
- Scrub the weld area with a wire brush for a smooth finish.
- Regularly inspect your tools for sharpness and efficiency.
- Clean immediately after welding to ease slag removal.
- Selecting the appropriate grit size for your flap disc can significantly improve the quality of your weld surface.
Frequently Asked Questions
Do You Need a Chipping Hammer for Flux Core?
Yes, you need a chipping hammer for flux core applications. Its benefits include effectively removing thick slag, ensuring clean surfaces for welds, and enhancing overall weld quality by preventing potential weaknesses from residual impurities.
What Is the Golden Rule in Welding?
In welding, the golden rule’s cleanliness; make certain metal surfaces are free of contaminants. Employ proper welding techniques and safety practices to avoid defects, guaranteeing strong, reliable welds every time you spark up your torch.
When to Use a Chipping Hammer?
You should use a chipping hammer right after welding while slag’s warm. Employ effective chipping techniques, and guarantee proper hammer maintenance for best results. This prevents slag hardening, making your cleanup more efficient and enhancing weld quality.
What Are Common Flux Core Welding Mistakes?
Imagine baking a cake without measuring ingredients; common flux core welding mistakes stem from poor preparation. Misconceptions like improper cleaning methods, incorrect heat settings, and bad technique can ruin your welds. Stay precise for better results.
Conclusion
In welding, “a clean weld is a strong weld.” After using your chipping hammer and wire brush, take a moment to inspect your work for any missed slag or impurities. Proper cleaning not only enhances the appearance but also guarantees the integrity of your weld. By following these techniques and maintaining your tools, you’ll achieve ideal results every time. Remember, diligence in preparation leads to excellence in execution. Happy welding!


