How to Weld an Automotive Roll Cage Safely
What’s in This Article
- Understanding the Importance of a Roll Cage in Vehicle Safety
- Estimated Time and Before You Begin
- Essential Tools and Equipment for Welding a Roll Cage
- Preparing Your Vehicle for Roll Cage Installation
- Step-by-Step Guide to Installing the Main Hoop
- Proven Techniques for Strong, Durable Welds
- Common Welding Mistakes and How to Avoid Them
- Follow NHRA Guidelines for Compliance
- Post-Welding Steps for Structural Integrity
- Safety Measures to Follow During Welding
- Tips for Continuous Improvement in Welding Skills
- Frequently Asked Questions
- Conclusion
A weak roll cage weld can fail when you need it most. To weld an automotive roll cage safely, you need approved tubing, clean joints, accurate notches, sound welds, and careful inspection. This guide shows you how to prepare the vehicle, fit the main hoop, avoid common welding mistakes, and work with safer habits from start to finish.
Quick Answer
To weld an automotive roll cage safely, use rule-compliant tubing, clean every joint, notch tubes tightly, tack the full cage first, then weld in short sections to control heat. You should also wear proper personal protective equipment (PPE), ventilate the workspace, disconnect the vehicle battery, and have a qualified inspector review the finished cage before track use.
Key Takeaways
- Use roll cage tubing that matches the rulebook for your racing class.
- Fit every tube tightly before you tack or finish weld the cage.
- Control heat by welding short sections instead of long continuous beads.
- Inspect every weld for full fusion, uniform bead shape, cracks, gaps, and porosity.
- Ask a qualified tech inspector or experienced cage builder to review critical work.
Understanding the Importance of a Roll Cage in Vehicle Safety
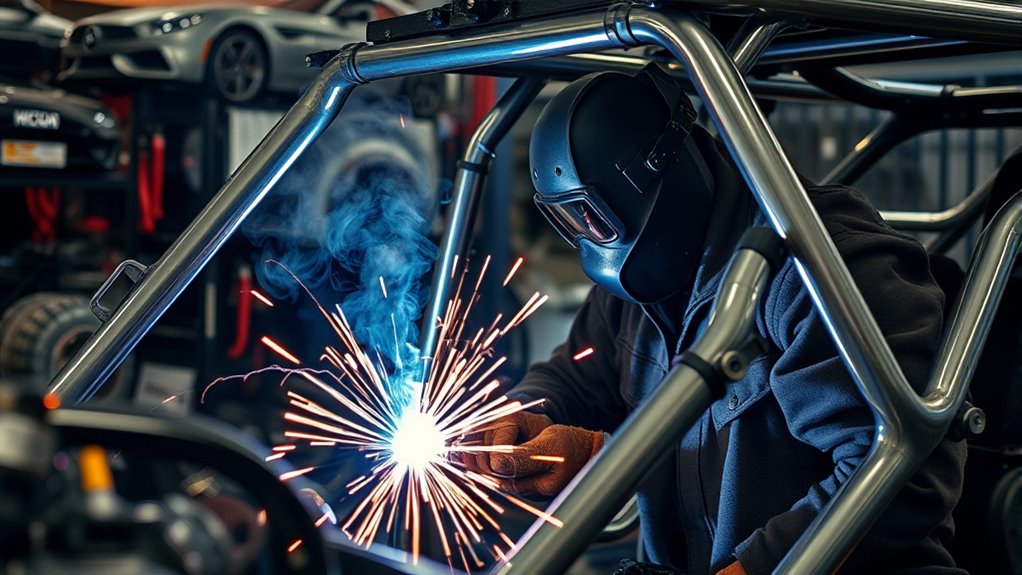
A roll cage gives the cabin more structural support during a rollover or hard impact. It helps protect the space around you when the vehicle body bends, twists, or crushes.
You need more than strong-looking tubing. You need the right material, correct tube size, clean joints, sound welds, and a design that follows the rulebook for your racing body.
Proper roll cage welding starts with approved tubing, tight joints, clean metal, and welds that can handle high impact loads.
Groups such as the National Hot Rod Association (NHRA) set roll cage rules for many drag racing classes. Other motorsport groups may use different rules, so check the rulebook that applies to your vehicle before you cut any tube.
Poor welds can reduce cage strength and create failure points. You should also maintain proper ventilation during welding to reduce exposure to fumes and gases.
Estimated Time and Before You Begin
A roll cage installation can take several days or longer, depending on your vehicle, cage design, and welding skill. Plan extra time for measuring, notching, fitting, tack welding, final welding, inspection, and cleanup.
Before you begin, confirm these items:
- Your tubing meets the rules for your racing class.
- Your vehicle interior has enough clearance for safe cage placement.
- Your welder can handle the tube size and wall thickness.
- Your workspace has ventilation, lighting, and fire protection.
- Your battery and sensitive electronics can be disconnected or protected.
Warning: A roll cage affects occupant safety, so don’t use it for racing until a qualified inspector checks the design and weld quality.
Essential Tools and Equipment for Welding a Roll Cage
When you start welding a roll cage, the right tools help you make tight joints and cleaner welds. Poor fit-up makes welding harder and weakens the finished cage.
Use a high-quality tubing notcher, such as a JD2-style notcher or an Ol Joint Jigger-style tool, to cut accurate tube joints. A Millermatic 212 welder with .030 wire and a 75/25 argon/CO2 gas mix can work well for many mild steel roll cage jobs when the setup matches the tubing and wire.
For accurate tube joint patterning, you can use a Pipemaster-style tool. It helps you copy tube shapes and make tighter fits before welding.
Practice with test joints in flat, vertical, overhead, and sideways positions. This practice helps you build steady travel speed, better heat control, and more consistent welds.
You should also follow maximum fillet weld size guidance when you size welds for plates and joints. Keep gloves, a welding helmet, flame-resistant clothing, eye protection, and hearing protection close before you start.
Good tools don’t replace skill, but they help you work with better control.
Products Worth Considering

Fits 1-3/4" Tube – Ensure you choose the correct size for your project.
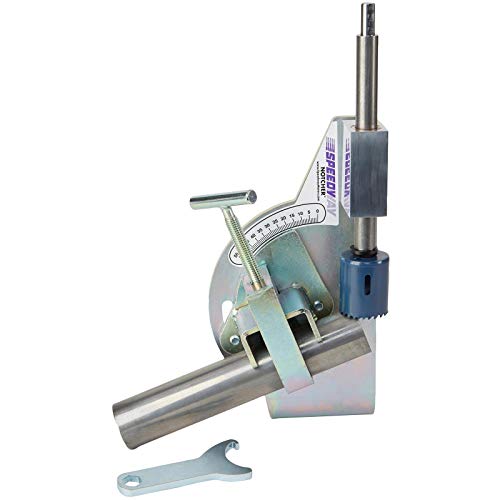
Precision Fabrication Tool: Ideal for building roll cages, chassis, crossmembers, bumpers, and custom headers with accurate tube coping and repeatable fitment.

Adjustable Workpiece Degree Range: Features an adjustable angle capability ranging from 0 to 60 for versatile cutting applications
Preparing Your Vehicle for Roll Cage Installation
Clear the interior before you measure and fit the cage. Remove seats, carpet, trim, insulation, and other flammable materials near the welding area.
Next, mark the locations for the frame connectors. Align them with the torque box and other structural points so the cage can transfer loads through strong areas of the chassis.
If your cage kit calls for an Extreme Duty frame connector, follow the kit instructions before cutting the floor. Some installations require cutting a 2-inch section from the front frame rail area to the rear frame rail area to make room for the connector.
Measure before every cut, then test-fit each part before you tack or weld it in place.
Once the frame connector sits in position, weld it securely around the required edges. This step helps support the main hoop and roll bar.
Clean metal helps the weld fuse properly. Proper surface preparation removes paint, rust, seam sealer, grease, and coating that can contaminate the weld.
A well-prepared vehicle gives you a safer base for a stronger roll cage installation.
Products Worth Considering

Secure Connection: Designed for wood-framed structures, the 2x6 joist hanger strengthens the connection between the joists and headers, providing higher structural stability. It ensures the building's safety and reliability, even under strong winds and heavy loads

Quick Frame Nylon 3 Way Corner Connector (10 Pack)
Step-by-Step Guide to Installing the Main Hoop
Installing the main hoop requires careful measuring and fitting. Use the steps below as a general guide, but follow the cage kit instructions and your racing rulebook first.
- Cut the main hoop to fit: Trim the bottom of the main hoop so it sits flat on the outrigger, floor plate, or approved mounting point.
- Support the hoop: Use a prop rod or temporary support to hold the front section in place while you check the position.
- Tack the hoop: Tack the main hoop in place after you confirm height, side clearance, and alignment.
- Fit the halo bar: Place the halo bar at the roof line and align it with the main hoop.
- Prepare the A-pillar bars: Mark and cut the needed openings in the floor or trim areas before fitting more tubes.
- Check all measurements: Confirm tight fits and proper placement before you make full welds.
A consistent fit helps you make stronger welds. Maintaining a consistent standoff distance also helps when you cut or prepare metal for the job.
| Task | Why It Matters |
|---|---|
| Cut main hoop | Creates a precise fit |
| Tack main hoop | Holds the cage stable before full welding |
| Check measurements | Confirms alignment and clearance |
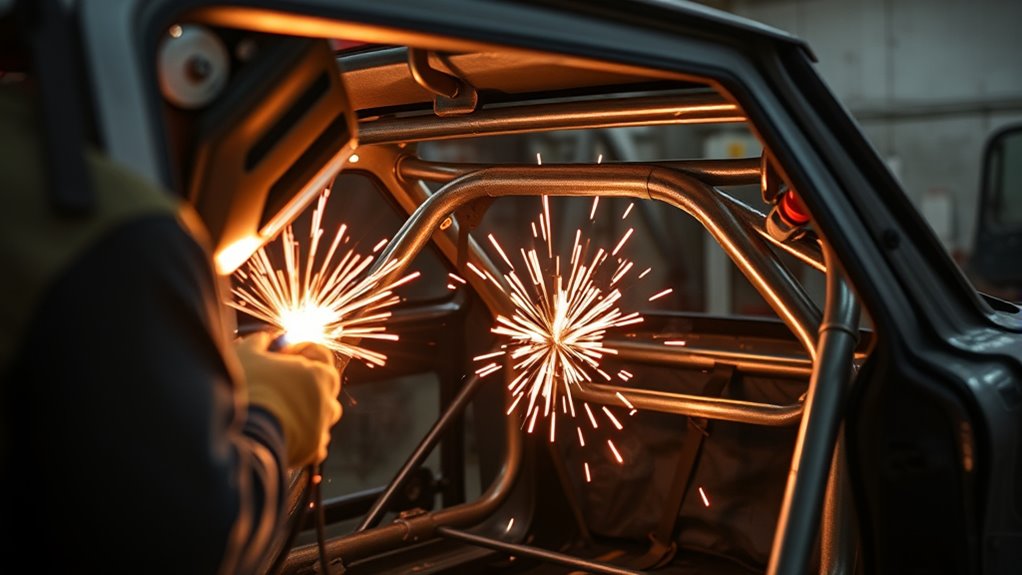
Proven Techniques for Strong, Durable Welds
Strong welds start before you pull the trigger. You need clean metal, tight joints, correct settings, and steady body position.
Cut the tubes accurately and tack the entire cage together before finish welding. This process helps you hold alignment and reduce movement during welding.
Tight fit-up reduces gaps, improves fusion, and makes each weld easier to control.
Set your Millermatic 212 welder for the tube thickness, wire size, and shielding gas you use. If you use .030 wire with a 75/25 argon/CO2 mix, test the settings on scrap tubing before welding the cage.
Weld short sections, about one-third of the joint at a time, to control heat and reduce distortion. Move around the cage instead of loading too much heat into one area.
Use reinforcement plates where the design and rulebook require them. Plates can help spread load, but they don’t fix weak design or poor welds.
Practice overhead and sideways welds before you work inside the vehicle. You may also need to manage welding challenges such as porosity and spatter because they can weaken weld quality.
Common Welding Mistakes and How to Avoid Them
Small mistakes can create weak points in an automotive roll cage. Misalignment, poor penetration, dirty metal, and wrong material choices can all reduce strength.
Improper heat input control can also cause burn-through, cold lap, or weak welds. Use practice joints to confirm your settings before you weld critical cage parts.
Common Welding Technique Mistakes
Focus on these four habits when you weld a roll cage:
- Confirm precise fit-up: Cut and measure tubes carefully so gaps don’t weaken the joint.
- Tack the entire cage: Tack all parts before final welding so the cage stays aligned.
- Start small: Weld short sections to control heat and reduce distortion.
- Practice in various positions: Build skill in overhead, vertical, and awkward positions before working inside the car.
Regular inspection and feedback help you improve weld quality before a small issue becomes a major problem.
Material Selection Errors
Material selection affects both safety and performance. Always choose roll cage tubing that matches your racing body’s rules for material, outside diameter, and wall thickness.
Don’t use non-certified tubing, exhaust tubing, or unknown scrap metal for a safety cage. These materials may not handle crash loads.
Inspect every tube before welding. Reject tubing with dents, deep rust, cracks, poor dimensions, or damage near a bend or notch.
Ask experienced cage builders or inspectors for guidance if you feel unsure about tubing choice. Their feedback can help you avoid costly and unsafe mistakes.
Inadequate Weld Penetration Issues
Inadequate weld penetration can reduce the structural integrity of your automotive roll cage. It can also hide under a bead that looks acceptable at first glance.
Use these steps to reduce the risk:
- Choose the right process: Use a welding method that can fuse the tube wall fully.
- Prepare each joint: Clean the metal until you remove paint, rust, oil, and coating.
- Match the filler: Use wire or filler that suits the base metal and tube thickness.
- Inspect the weld: Look for undercut, porosity, lack of fusion, cracks, and gaps.
Follow NHRA Guidelines for Compliance
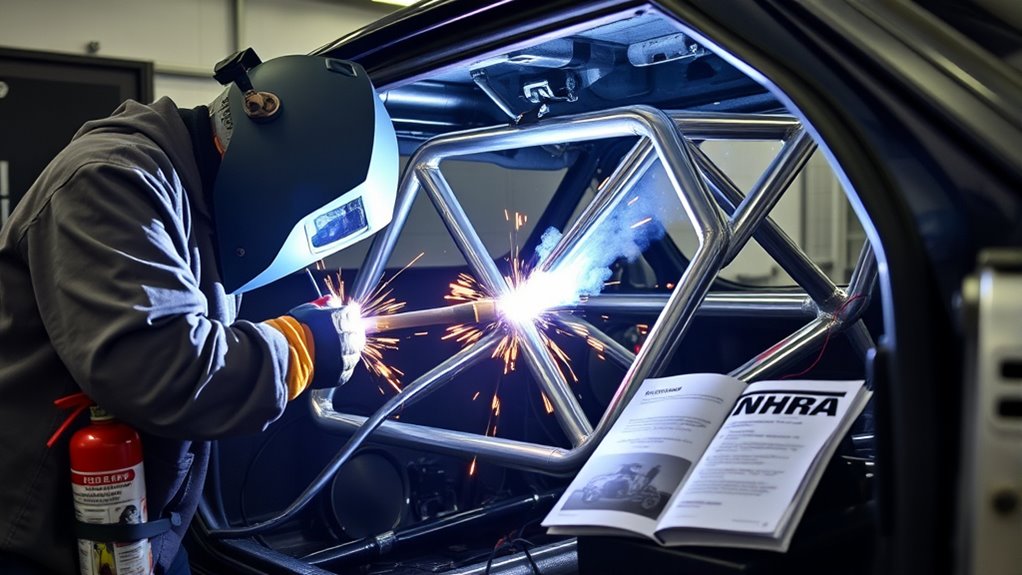
To help your automotive roll cage meet safety and performance rules, follow the current NHRA guidelines or the rules for your racing body. Rulebooks can change, so check the latest version before you build.
Confirm tube dimensions, material type, mounting plates, gussets, and bar placement before welding. Some rules may specify details such as 1 3/4-inch x 1 3/4-inch plate gussets for certain repairs or incomplete weld areas.
Don’t assume every gusset can replace missing weld length. Your rulebook may limit how much weld replacement a gusset can cover.
Use proper welding techniques, clean joint preparation, and complete welds to improve compliance and safety. Understanding flux core MIG welding settings can also help you see how settings affect penetration, heat, and bead shape.
Ask a tech inspector to review your design before final welding if possible. That step can save time and reduce the risk of failing inspection later.
Post-Welding Steps for Structural Integrity
After welding, inspect all joints and connections for full fusion, uniform bead shape, cracks, porosity, gaps, and undercut. Reinforce critical attachment points with plates or gussets only where the design and rules allow them.
Ask an experienced welder or tech inspector to review the cage before you paint it. Once paint covers the welds, you may miss flaws that need repair.
You should also make sure all welds receive a proper visual check. This properly inspected approach helps confirm that the welds meet the safety standard for your use.
Inspect Weld Quality Thoroughly
Weld inspection may feel slow, but it protects the strength of the roll cage. Follow these steps before you call the job finished:
- Check bead shape: Look for steady bead width, smooth tie-in, and a uniform pattern.
- Check fusion: Verify that each weld joins both pieces without gaps or cold edges.
- Ask for review: Have a qualified inspector or experienced cage builder evaluate the cage.
- Document repairs: Record any modifications, repairs, gussets, or rule-related changes.
This inspection process supports safety and helps you find problems while you can still fix them.
Reinforce Critical Attachment Points
Critical attachment points carry high loads, so they need careful fit-up and reinforcement. Use thick reinforcement plates where the design requires them, and size each plate to spread stress across a larger area.
Inspect all welds at the main hoop, frame junctions, crossbars, and side supports. Add gussets only where they improve strength and match the rulebook.
| Attachment Point | Example Plate Size | Example Gusset Technique |
|---|---|---|
| Main Hoop to Floor | 1/4″ thick | Triangular gussets |
| Frame Junctions | 3/16″ thick | L-shaped gussets |
| Crossbars | 1/8″ thick | Diagonal gussets |
| Side Supports | 1/4″ thick | Reinforced corners |
Use these sizes only as examples. Your rulebook, vehicle structure, and cage design should guide the final choice.
Safety Measures to Follow During Welding
Welding a roll cage creates heat, sparks, ultraviolet light, fumes, and fire risk. Protect yourself and the vehicle before you strike an arc.
Follow these vital safety measures:
- Wear appropriate PPE: Use welding gloves, a welding helmet with the correct lens shade, safety glasses, hearing protection, and flame-resistant clothing.
- Ventilate the workspace: Move fumes away from your breathing zone and avoid welding near coatings that can release harmful gases.
- Keep fire protection nearby: Place a suitable fire extinguisher close to the work area and remove flammable materials.
- Inspect equipment: Check the welder, leads, ground clamp, gas hose, regulator, and safety gear before you start.
- Protect the vehicle: Disconnect the battery and protect wiring, fuel lines, brake lines, glass, and upholstery from sparks and heat.
If you grind or cut during the job, use only compatible accessories. You should also confirm that all accessories are grinder-rated accessories before use.
Tips for Continuous Improvement in Welding Skills
To improve your welding skills, practice often in different positions, including overhead and sideways. These positions matter because roll cage welding often forces you into tight and awkward areas.
Ask experienced welders for feedback on your beads, travel speed, heat control, and body position. Their advice can help you fix problems before you weld the actual cage.
Clean base metal also improves weld quality. Review how cleaning base metal affects porosity, fusion, and bead consistency.
Practice Regularly
Regular practice helps you build the control needed for a reliable automotive roll cage. Use these focused methods:
- Vary welding positions: Practice flat, vertical, overhead, and sideways welds.
- Use scrap materials: Build test joints from scrap tubing before you weld critical parts.
- Control wire speed: Adjust wire speed on practice pieces until the arc sounds steady and the bead ties in well.
- Add real challenges: Practice in tight spaces so you can prepare for work inside the vehicle.
Ask for feedback after each practice session. Clear feedback helps you improve faster than guessing on your own.
Seek Expert Guidance
Expert guidance can speed up your progress and help you avoid unsafe habits. Work with experienced welders, instructors, or cage builders when you can.
Use welding forums, instructional videos, workshops, and local welding classes to build your knowledge. Focus on roll cage rules, joint fit-up, weld inspection, and safety standards.
Record your practice welds when possible. Reviewing your work helps you spot hand movement, torch angle, and speed issues that you may miss during welding.
Frequently Asked Questions
What Kind of Welding Is Used for Roll Cages?
You’ll often use metal inert gas (MIG) welding for mild steel roll cages because it offers speed and strong joints when set up correctly. Tungsten inert gas (TIG) welding can work well for precise joints and materials that need more control.
What Is the Golden Rule in Welding?
The golden rule in welding is simple: make a clean, sound connection before you trust the joint. Clean the metal, fit the pieces tightly, use the correct settings, and protect yourself with proper safety gear.
Why Do Welders Not Live Long?
Welders can face health risks from fumes, ultraviolet light, heat, noise, and repetitive exposure if they ignore safety. You can reduce risk by using ventilation, respirator protection when needed, correct PPE, and safer work habits.
Should I Disconnect the Battery When Welding on a Vehicle?
Yes, you should disconnect the battery before welding on a vehicle. This helps reduce the risk of electrical damage to sensitive parts and lowers the chance of accidental shorts during welding.
Can a Beginner Weld a Roll Cage?
A beginner can practice the skills, but a safety cage should not become a first welding project. Build practice joints first, get expert feedback, and have a qualified inspector check any cage that will protect people.
Do I Need to Follow NHRA Rules for a Street Car Roll Cage?
You need NHRA rules if you plan to race in an NHRA class or at a track that follows those rules. For a street car, you should still use a recognized safety standard and make sure the cage does not create new head-impact hazards.
Safety Disclaimer: This article is for informational purposes only and does not replace guidance from a certified welder, motorsport tech inspector, cage builder, or safety professional. Always follow the current rulebook for your racing class and get professional inspection before using a roll cage on track.
Conclusion
A safe roll cage depends on approved material, tight fit-up, clean welding, careful heat control, and honest inspection. Start by checking the rulebook for your racing body before you buy tubing or cut the vehicle.
Practice on scrap tubing until your welds stay consistent in awkward positions. Then ask a qualified inspector or experienced cage builder to review the finished work before you trust it in competition.
With patient prep and safe habits, you can build stronger welding skills and a safer structure.


