
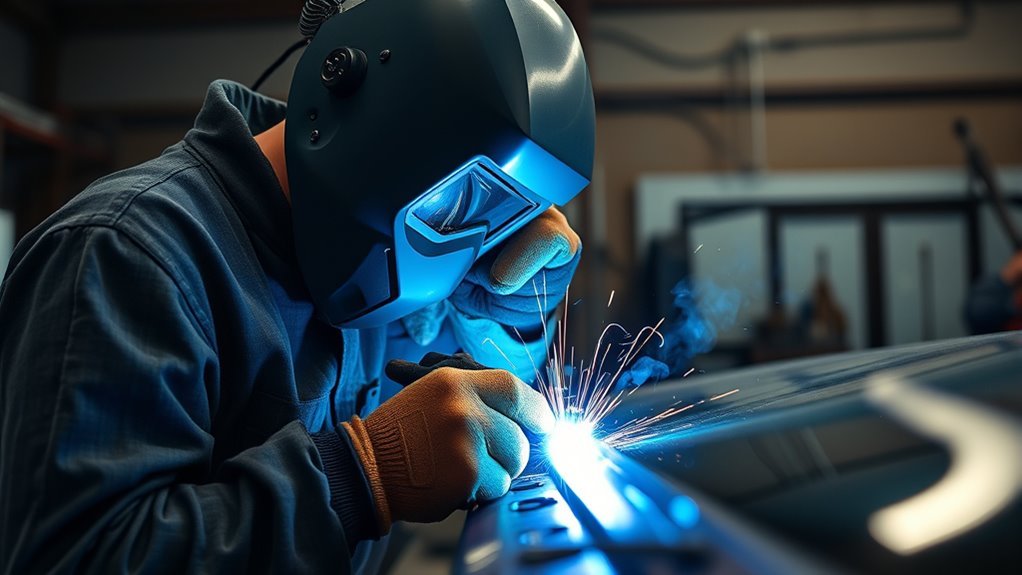
Automotive welding is learnable, but making a safe repair on a real vehicle takes more than learning how to run a bead. Most beginners build their first skills with gas-shielded MIG welding on clean mild-steel scrap. Before you weld a vehicle, you also need to understand heat control, joint fit-up, fire prevention, electrical isolation, material identification, and the vehicle maker’s repair instructions.
Quick Answer
Automotive welding is manageable for beginners when you start with MIG, practice on matching scrap, and avoid structural repairs. Learning basic machine control may come quickly, but safe vehicle work also requires clean metal, correct fit-up, fire control, electrical precautions, weld inspection, and the correct OEM repair procedure.
Key Takeaways
- Gas-shielded MIG welding is often the easiest starting process for clean mild-steel practice pieces and basic non-structural automotive work.
- A good-looking bead does not prove that a weld has enough fusion or that the repair follows the vehicle maker’s requirements.
- Clean metal, tight fit-up, controlled heat, correct work-clamp placement, ventilation, and fire prevention are essential.
- Do not weld frames, rails, pillars, suspension mounts, seatbelt areas, steering parts, battery enclosures, roll cages, or crash structures without the required training and repair procedure.
- Hybrid and electric vehicles require vehicle-specific high-voltage safety procedures before welding, cutting, or grinding.
At a Glance
| Time Required | There is no fixed hour requirement. Practice until you can repeatedly produce and test sound welds on the same material, thickness, joint, and position as the planned project. |
| Difficulty | Beginner for basic MIG machine practice; intermediate or advanced for thin panels, aluminum, positional welding, inspection, and vehicle repair planning. |
| Tools Needed | Suitable welder, correct wire and gas, helmet, gloves, protective clothing, ventilation or source extraction, grinder, wire brush, clamps, measuring tools, fire extinguisher, and matching scrap. |
| Cost | Varies widely by location, power requirements, machine capability, gas-cylinder purchase or lease, PPE quality, ventilation, consumables, and metal-preparation tools. |
Warning: This guide explains beginner principles, not a vehicle-specific repair procedure or welding qualification. Before welding any vehicle part, identify the material and obtain the current repair information for that exact year, make, model, and repair location.
What Automotive Welding Means
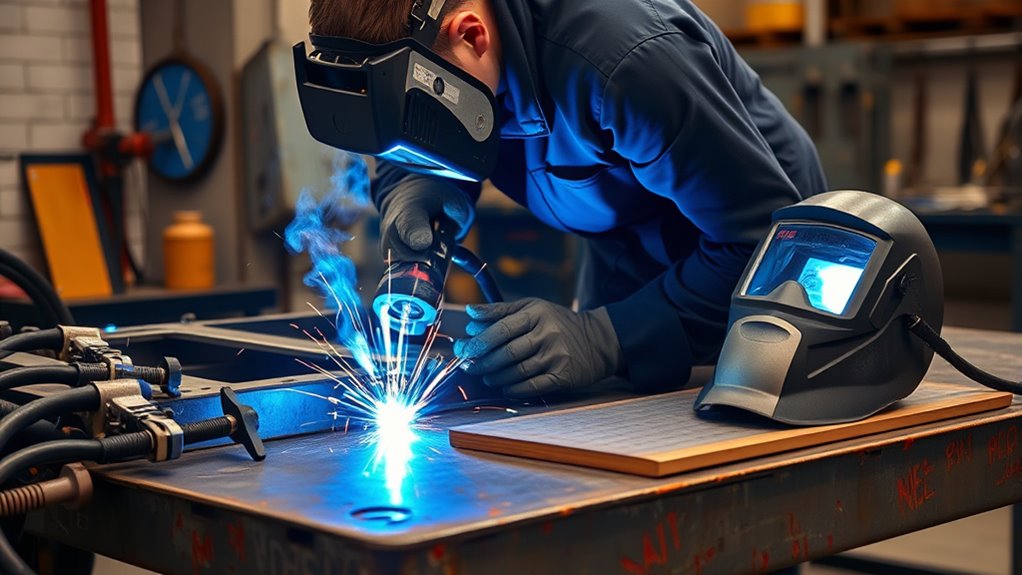
Automotive welding is the process of joining or repairing vehicle metal with an approved welding process, filler material, joint design, and heat input. It may be used for body patches, brackets, exhaust parts, fabrication, restoration, or collision repair, but those jobs do not have the same risk level.
On a car, the goal is not simply to make two pieces stick together. The joint must match the material and thickness, tolerate service loads and vibration, control distortion, and preserve nearby coatings and components. On structural repairs, it must also follow the vehicle maker’s attachment and sectioning procedure.
The U.S. Bureau of Labor Statistics explains that welders choose processes based on factors such as the metals being joined. Automotive work may involve mild steel, galvanized steel, high-strength steel, ultra-high-strength steel, stainless steel, cast materials, and aluminum.
MIG welding is common because it is fast and practical for many mild-steel repairs. TIG welding gives precise control for suitable materials and fabrication work. Flux-core wire can be useful outdoors or on suitable thicker steel, but self-shielded wire produces slag and more smoke, which makes neat thin-panel work harder.
Learning automotive welding can expand what you repair and fabricate on your own. It also gives you a responsibility to recognize when a part, material, or repair is outside your training.
Is Automotive Welding Hard to Learn?
Automotive welding is not especially hard to begin, but it takes time to perform consistently. Many beginners learn the basic MIG gun motion quickly. The harder skills are reading the puddle, controlling heat, fitting panels, recognizing defects, testing welds, and deciding whether a repair is appropriate.
Learning to create an arc is the easy part. Safe automotive welding depends on preparation, repeatability, inspection, and knowing when the vehicle maker requires a different repair method.
You do not need a college degree to begin practicing, but you do need repetition and informed feedback. Start with scrap pieces that match the type and thickness of the metal you plan to use. Thin automotive sheet can burn through or distort quickly, so spaced tacks and controlled arc time are usually more useful than a long continuous bead.
- Practice on scrap first: Run beads, then lap joints, butt joints, plug welds, and the positions required for your planned project.
- Study heat and fusion: Look for burn-through, distortion, undercut, porosity, lack of fusion, excess reinforcement, and uneven bead shape.
- Test your work: Cut, bend, peel, or break practice coupons so you can see whether the weld fused into both pieces.
- Ask for qualified feedback: An instructor, experienced welder, or collision-repair technician can often identify a problem that a beginner cannot see from the surface.
Rough first welds are normal. Do not measure progress by appearance alone. Measure it by whether you can repeat the joint, confirm fusion, avoid excessive distortion, and explain why you selected the settings and process.
Which Welding Process Should You Start With?
For many beginners practicing on clean mild steel, the most approachable process is gas-shielded MIG welding. It feeds wire continuously, which lets you focus on gun angle, stickout, travel speed, arc position, and puddle control.
TIG offers precise control but requires coordinated torch and filler movement, and sometimes separate amperage control. Stick welding is useful for many thicker-steel jobs, but it is generally too aggressive and difficult to control on thin body panels. Self-shielded flux core is convenient outdoors, but its slag, fumes, and arc characteristics make thin visible panels less forgiving.
| Process | Good Beginner Use | Main Limitation |
| Gas-shielded MIG | Mild-steel coupons, brackets, patches, lap joints, and plug-weld practice. | Wind disrupts shielding gas; thin panels still require careful heat control. |
| TIG | Precise fabrication and suitable clean steel, stainless, or aluminum work after basic training. | Slower learning curve and very sensitive to contamination and fit-up. |
| Self-shielded flux core | Outdoor practice and suitable thicker steel when the wire specification permits. | Slag, smoke, spatter, and less forgiving control on thin body sheet. |
| Stick | Thicker general-fabrication practice. | Usually unsuitable for thin automotive body panels. |
Note: A 75/25 argon and carbon-dioxide blend, often called C25, is commonly used with solid mild-steel MIG wire. It is not a universal gas. Aluminum, stainless steel, flux-core wire, and vehicle-maker repair procedures can require different wire, gas, polarity, equipment, or attachment methods.
Check the welder chart, wire specification, machine manual, material information, and repair procedure. A settings chart gives you a starting point. It does not prove that the completed weld is acceptable.
Products Worth Considering

MULTIFUNCTIONAL: A 4-in-1 welder, capable of Flux Core MIG/Gas MIG/ Stick/Lift TIG (need to purchase extra tig lift torch). This unit caters to a wide range of welding applications and meets your various welding needs.

Synergic Control: The synergic MIG welder features advanced IGBT inverter technology with intelligent automatic voltage match, automatically selecting the recommended voltage and wire feed speed based on the selected wire. Fine-tune the voltage from -3V to +3V for greater welding precision, making it easy for beginners while giving experienced welders complete control over every weld.

WELD ANYWHERE: Plug in the Weld-Pak 90i MIG wire feed welder anywhere 120V input power is available; It's designed to use with flux-cored welding wire (1/4” max thickness) or solid MIG wire (3/16" max thickness)
Why MIG Is Best for Beginners
MIG is often easier to learn because the machine feeds the electrode wire continuously. You do not have to replace a stick electrode or coordinate a separate filler rod while learning basic arc placement.
It is also practical for thin mild steel when the machine, wire, shielding gas, fit-up, and technique are appropriate. You can make short tacks, move around a panel, and allow the metal to cool between welds.
The learning curve is still affected by machine quality, wire-feed stability, access, material condition, and the learner’s ability to see the joint. Helmet fit and a clear lens matter because you cannot control an arc you cannot see. Comfortable headgear, including the adjustment considerations discussed in this comfort and fit guide, may help you maintain a stable viewing position.
Easy To Learn
If you are new to welding, MIG gives you a simple practice loop. You can start from the machine’s chart, make a short weld on scrap, inspect it, and adjust one variable at a time.
You still need to learn voltage, wire-feed speed, contact-tip-to-work distance, gun angle, travel speed, joint fit-up, and work-clamp placement. Changing several settings at once makes it harder to identify what improved or damaged the weld.
- Confirm the machine polarity and wire specification.
- Set the machine from the chart for the actual metal thickness and wire size.
- Attach the work clamp to clean metal close to the practice joint.
- Clean the coupon to bright bare metal.
- Run a short weld and inspect both sides.
- Change one setting or technique variable, then repeat the same joint.
This controlled approach builds useful skill faster than making random beads with undocumented settings.
Ideal For Auto Work
For suitable mild-steel automotive work, a MIG welder can produce controlled tacks, plug welds, and short stitch welds. This makes it useful for non-structural patches, simple brackets, restoration practice, and exhaust-related fabrication when the process matches the material.
MIG can also reduce cleanup when shielding gas, wire condition, polarity, fit-up, and settings are correct. On a thin panel, you can space the tacks, move to another area, and allow the heat to spread rather than concentrating it in one location.
Beginner-friendly does not mean foolproof. A weld can look smooth while sitting on top of the joint with poor fusion. Thin sheet can also warp, crack, or burn through if the joint is contaminated, the gap is too wide, or the arc remains in one place too long.
How TIG Welding Differs for Car Work
TIG welding gives you precise control over the torch, filler addition, and amperage. It is slower and more demanding because one hand guides the torch, the other adds filler, and a foot pedal or fingertip control may regulate current.
- You can adjust the arc and filler separately, which is useful for precise fabrication.
- You can produce clean welds when the material, joint, shielding, tungsten, and fit-up are prepared correctly.
- You must maintain excellent cleanliness and coordination, especially in tight positions.
Precise control does not guarantee low total heat input. Slow travel or repeated reheating can still distort thin sheet. Practice arc time, travel speed, filler timing, and cooling intervals on matching coupons before working on a panel.
TIG can suit aluminum, stainless steel, visible fabrication, and other work where the material and procedure allow it. It is not a beginner recommendation for roll cages, harness mounts, seat mounts, suspension parts, or occupant-protection structures. Proper shielding gas flow and clean tungsten preparation remain essential for quality TIG welding.
When you need a careful, clean weld and have the training to control the process, TIG can be valuable. For basic mild-steel practice and many non-structural repairs, MIG is usually the faster starting point.
Where Flux Core Fits
Flux-core welding can be useful when portability matters or when wind would disturb an external shielding-gas envelope. Different flux-core wires have different gas, polarity, position, and material requirements, so the wire label and machine manual control the setup.
Self-shielded flux core is often harder for beginners on thin automotive sheet because it produces slag, more visible smoke, and usually more cleanup than solid-wire gas-shielded MIG. Arc characteristics and heat input vary by wire and settings, so do not assume that every flux-core product behaves the same way.
If you use flux-core welding, confirm polarity, use a wire intended for the material and thickness, maintain the recommended stickout, and remove all slag before inspecting or adding another pass. Flux does not make it acceptable to weld over paint, rust, oil, seam sealer, or undercoating.
Check the Vehicle Before You Weld
Before selecting a process, identify what the part does, what material it contains, and how the vehicle maker says it may be repaired. Part location alone does not reliably identify steel strength or an approved sectioning point.
Modern vehicles may combine mild steel, high-strength steel, ultra-high-strength steel, aluminum, castings, adhesives, rivets, resistance spot welds, MIG brazing, and conventional arc welds. Heating or sectioning the wrong material can change how the structure manages crash energy.
I-CAR’s structural-repair guidance explains that vehicle-specific workshop information provides the required welding and sectioning joint for a repair. Obtain that information before removing a panel, drilling factory welds, applying heat, or choosing a replacement joint.
- Identify the vehicle: Record the exact year, make, model, body style, powertrain, and repair location.
- Identify the part’s function: Determine whether it carries loads, manages crash energy, mounts a restraint, seals a battery, or controls alignment.
- Obtain the repair procedure: Confirm the approved cut locations, attachment method, weld count, adhesive, corrosion protection, and measuring requirements.
- Check your capability: Stop if the repair requires tools, training, measuring equipment, or qualifications you do not have.
Warning: Never assume that a panel is ordinary mild steel because it looks thin or because an older vehicle used mild steel in a similar location.
Tools and Safety Gear You Need
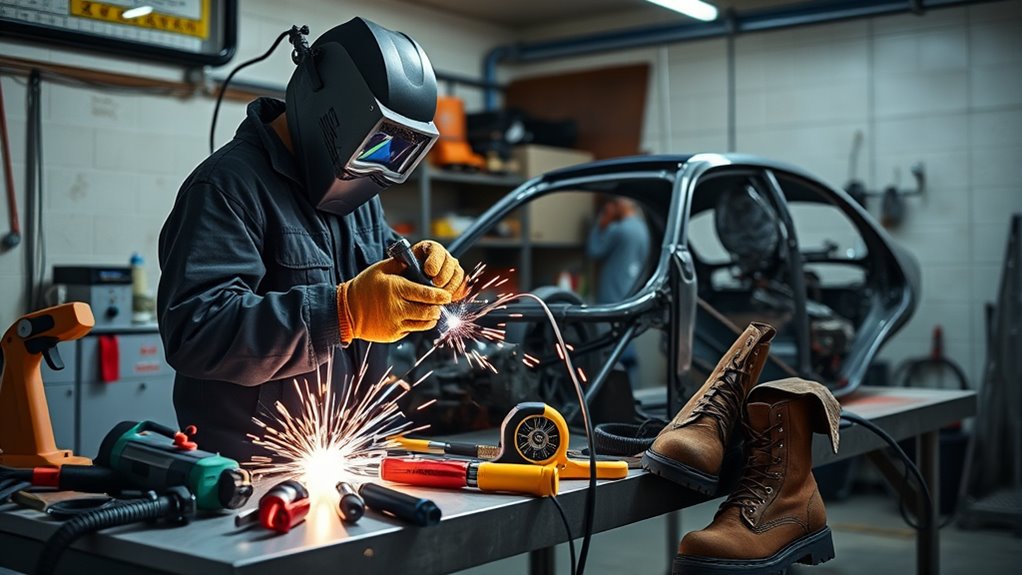
Clean automotive welds depend on suitable equipment and safety gear. At minimum, you need a welder that can control the intended material thickness, the correct wire and gas, a sound work lead, clamps, measuring tools, a grinder, a wire brush, and matching scrap for testing.
For mild-steel MIG, many beginners use solid wire with an argon and carbon-dioxide blend. Aluminum, stainless steel, galvanized material, and flux-core wire require different decisions. Do not assume one wire, gas, polarity, or drive-roll setup fits every material.
Your PPE should include a welding helmet with an appropriate shade, safety glasses under the helmet, welding gloves, flame-resistant clothing, closed leather footwear, and hearing and face protection for grinding. Synthetic clothing can melt when hit by sparks or hot metal.
OSHA’s welding safety resources cover arc radiation, fire, electrical, and fume hazards. NIOSH notes that welding fumes contain metals and commonly include some manganese.
A welding helmet protects your eyes and face, but it does not control fumes, hidden fire, electrical current paths, or toxic coatings.
Use local exhaust ventilation or source capture where practical so fumes move away from your breathing zone. A random dust mask is not a substitute for ventilation. Workplace respirators must be selected for the hazard and used under an appropriate respiratory-protection program, including medical evaluation and fit testing where required.
Keep an angle grinder available for joint preparation, but use the guard, correct wheel, safety glasses, face protection, and hearing protection described in this guide to essential personal protective equipment.
Products Worth Considering
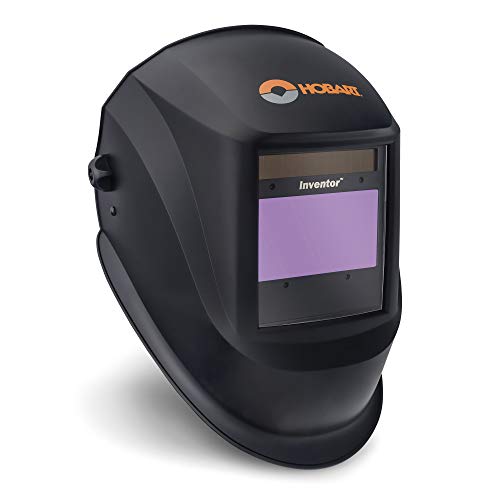
Technology You Can Trust: Get continuous UV & IR protection with our Hobart 77890 Inventor Auto Darkening Welding Helmets for men & women; Engineered for your safety with an auto-on/off power control that triggers the lens at the strike of an arc

Head-to-Hand Safety, One Complete Package – A professional auto-darkening helmet paired with premium heat-resistant gloves, all in one kit. The helmet blocks arc flash and harmful rays, while the gloves stand up to heat, sparks, and sharp metal – complete protection from head to hand, weld after weld.

【True Color View & Better Clarity】TRQWH welding helmet features advanced true color technology with top 1/1/1/2 optical clarity, restoring every detail of your workpiece. Perfect for fine TIG welding or intricate fabrication where visual accuracy is critical. Plus, wide view with USB rechargeable top LED light, comfortable operation even in dim or dark environments, ideal for indoor fabrication, night repair & DIY metal work
Shielding-Gas Cylinder Safety
- Secure the cylinder upright so it cannot fall or be struck.
- Keep oil, grease, sparks, and heat away from the regulator and valve.
- Use a regulator, hose, and fittings intended for the gas and pressure.
- Check connections for leaks using the method recommended by the equipment supplier.
- Do not lift or drag a cylinder by the regulator or valve.
- Close the cylinder valve and release line pressure when the equipment is not in use.
How to Set Up a Safe Welding Area
Welding, cutting, and grinding are hot work because they can produce flames, heat, sparks, hot slag, or another ignition source. OSHA’s hot-work guidance emphasizes controlling flammable atmospheres and combustible materials before work begins.
Warning: Do not weld near fuel vapor, leaking fuel systems, batteries, deployed or undeployed restraint components, pressurized containers, undercoating, carpet, insulation, or recently used solvent. Never weld a tank, line, container, or closed cavity unless it has been professionally cleaned, isolated, tested, vented, and prepared for hot work.
- Ventilate the area: Position source extraction so it removes fumes without pulling shielding gas away from the arc.
- Remove flammables: Move rags, solvents, cardboard, trim, sound deadener, fuel-soaked parts, and other combustibles away from the work.
- Inspect both sides: Check behind and beneath the panel for wiring, hoses, modules, insulation, seam sealer, fuel lines, brake lines, glass, and interior trim.
- Protect nearby parts: Shield paint, glass, wiring, rubber, upholstery, and finished surfaces from sparks and spatter.
- Keep extinguishing equipment ready: Use an extinguisher appropriate for the hazards in the work area and know how to call for help.
- Use a fire watch when required: OSHA requires a fire watch for at least 30 minutes after qualifying welding or cutting work. Continue checking longer when heat may have entered concealed spaces.
Never weld in a confined space without the required training, atmospheric controls, ventilation, rescue planning, and monitoring. NIOSH states that confined-space welding can significantly increase manganese-fume exposure.
Battery, Electronics, and EV Safety Before Welding
Do not rely on a universal instruction such as “remove the negative terminal.” Disconnect procedures vary because modern vehicles can contain supplemental-restraint modules, battery-monitoring sensors, backup power, telematics, coded systems, capacitors, and multiple low-voltage batteries.
Obtain the vehicle maker’s welding and battery-disconnection procedure first. Follow required waiting times and memory, restraint, window, steering, and initialization steps. Keep the welding-current path as short as practical by placing the work clamp on clean metal close to the joint.
Avoid positioning the clamp so welding current may pass through wheel bearings, hinges, steering parts, control modules, wiring, sensors, or electronic assemblies. Do not attach the clamp to a painted, rusty, loose, or moving part.
Warning: Hybrid and electric vehicles contain high-voltage components that can cause fatal shock, fire, or battery damage. Do not cut, grind, heat, or weld an EV or hybrid until a trained person has followed the exact OEM disablement, verification, component-clearance, and battery-handling procedure.
I-CAR’s high-voltage safety information stresses OEM training and vehicle-specific procedures. Orange cables should be treated as high voltage, but color alone is not a complete identification or safety method.
How to Prepare Automotive Metal Before Welding
Many weak beginner welds begin before the arc starts. Rust, oil, paint, seam sealer, galvanizing, undercoating, moisture, and dirt can interfere with the arc, create porosity, hide the joint, and produce hazardous fumes.
Clean the joint to bright metal on both sides where access permits. Remove coatings far enough from the heat-affected area to prevent contamination and ignition. Shape the edges, remove burrs, and fit the pieces closely without forcing them out of alignment.
Use a cleaner that is approved for the material and intended for pre-weld preparation. Read its safety data sheet, allow it to evaporate fully, and keep the container away from the work area. Never weld over a wet solvent or near vapor from a cleaner.
Pro Tip: Prepare a practice coupon from the same material and thickness, use the same joint gap and cleaning method, then set and test the machine before welding the vehicle.
Be extra careful with galvanized steel. Heating zinc coatings can create harmful fumes and contaminate the weld. Proper surface preparation, source extraction, hazard assessment, and correct respiratory controls are critical.
How to Practice on Scrap Metal
Scrap gives you a controlled place to learn without damaging a vehicle. Use known material that is close to the thickness, coating condition, joint type, and position of the work you eventually plan to perform.
- Clean each coupon: Remove rust, oil, mill scale, coatings, and moisture from the joint and clamp location.
- Measure thickness: Do not assume two pieces are the same gauge because they look similar.
- Build in stages: Start with arc placement and tacks, then practice lap, butt, plug, corner, vertical, and overhead joints as needed.
- Control fit-up: Practice maintaining the same gap, overlap, hole size, clamping, and joint alignment.
- Inspect and test: Look at the face and backside, then perform a bend, peel, cut, or break test on disposable coupons.
Keep a log of voltage, wire-feed speed, wire size, gas, flow setting, material thickness, joint type, position, stickout, and observed result. Adjust your wire-feed speed from the machine chart and wire guidance, then confirm the result through testing.
How to Test Practice Welds
Visual inspection is the first step, not the final proof. A weld can look smooth while having poor fusion at one edge or between overlapping sheets.
- Check the face: Look for a consistent profile, tied-in edges, limited spatter, no visible cracks, and no open porosity.
- Check the backside: Look for suitable heat evidence without excessive melt-through. Backside appearance varies by joint and procedure, so do not use color alone as proof.
- Bend a butt-joint coupon: A sound practice weld should tolerate bending without separating along an unfused edge.
- Peel a lap or plug-weld coupon: A strong practice plug weld should pull material from one sheet rather than cleanly releasing at the weld interface.
- Cut a cross-section: Grind and polish a disposable coupon so you can see whether the weld fused into both sides of the joint.
Note: Destructive scrap testing helps you learn, but it does not replace an approved welding procedure, required measurements, or professional inspection on a safety-critical repair.
Beginner Practice Plan
A structured plan helps you improve faster than running unrelated beads. Progress only when you can repeat and test the previous skill.
- Session 1: Learn the machine controls, polarity, wire loading, drive-roll tension, gas setup, work-clamp placement, and shutdown procedure.
- Session 2: Run short beads on flat mild-steel coupons and change one setting at a time.
- Session 3: Practice tacks and lap joints on thin scrap while controlling distortion.
- Session 4: Practice butt joints with controlled gaps and spaced stitch welds.
- Session 5: Practice plug welds, then peel or break the coupons to inspect fusion.
- Session 6: Repeat the required joints in vertical, horizontal, or overhead positions.
- Later sessions: Match the material, joint, access, and position of a low-risk project and repeat the tests.
Readiness is based on repeatable results, not a universal number of hours or welds. You should be able to reproduce the joint after changing coupons, restarting the machine, and working in the required position.
Common Beginner Welding Mistakes
The most common beginner failures come from poor preparation, unsuitable settings, unstable technique, bad fit-up, and weak inspection habits. Correcting the cause is more useful than grinding a defective weld until it looks smooth.
Poor Surface Preparation
Rust, oil, dirt, seam sealer, paint, moisture, and coatings can block fusion, destabilize the arc, create porosity, and produce harmful fumes.
- Remove contamination from the joint and work-clamp area.
- Strip paint, coatings, and undercoating away from the heat zone.
- Clean both sides when access permits.
- Allow approved cleaners to dry fully before hot work.
- Refit the joint after grinding so gaps remain controlled.
Preparation improves arc stability and makes the joint easier to inspect, but it cannot correct an unsuitable material or repair method.
Wrong Heat Settings
Excess heat can burn through thin sheet and enlarge the heat-affected area. Too little effective heat, poor arc placement, or excessive travel speed can leave the weld sitting on top without fusing into both pieces.
Use the machine chart as a baseline, then test the same joint on matching scrap. Watch the puddle edges, listen for an unstable arc, and inspect the backside and a destructive test coupon.
For thin car panels, spaced tacks and short stitch welds are often more controllable than one continuous bead. Move around the panel and allow natural cooling. Do not quench a hot structural repair unless the approved procedure specifically calls for it.
Weak Practice Habits
Practice is less useful when you change several variables, use unknown scrap, skip cleaning, or judge every weld only by appearance.
- Use known material and measure its thickness.
- Document the machine and consumable settings.
- Keep the joint gap and position consistent.
- Change one variable at a time.
- Test disposable coupons instead of trusting the surface.
- Wear full PPE for every tack, grind, cut, and test.
These habits show you why a weld changed and make it easier to repeat a successful result.
Automotive MIG Troubleshooting
| Problem | Likely Causes | What to Check |
| Burn-through | Excess arc time, large gap, unsuitable settings, poor torch placement, or metal thinner than expected. | Measure thickness, tighten fit-up, shorten tacks, verify settings, and test on matching scrap. |
| Panel warping | Too many welds in one area, long beads, poor clamping, or excessive grinding heat. | Space welds, move around the panel, pause for cooling, and reduce grinding pressure. |
| Lack of fusion | Arc placed on one side, contamination, low effective heat, excessive travel speed, or poor joint access. | Clean the joint, center the arc, verify stickout and settings, then perform a destructive coupon test. |
| Porosity | Oil, moisture, paint, wind, leaking gas connections, blocked nozzle, or incorrect gas flow. | Clean and dry the metal, shield the work from wind, inspect gas delivery, and clean the nozzle. |
| Excess spatter | Incorrect voltage or wire speed relationship, wrong polarity, contamination, unstable stickout, or poor work connection. | Confirm polarity, clean the clamp point, stabilize stickout, and adjust one machine setting at a time. |
| Wire stubbing or bird-nesting | Poor drive-roll tension, wrong groove, damaged liner, blocked tip, tangled spool, or unsuitable gun setup. | Follow the machine manual for drive rolls, liner, contact tip, spool tension, and wire path. |
Can You Learn Automotive Welding Without School?
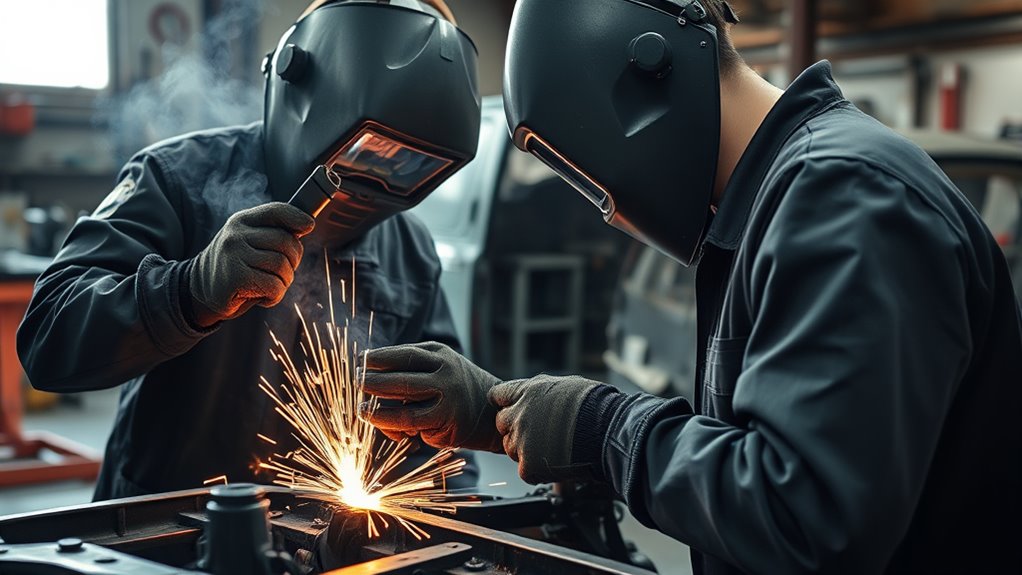
Yes, you can learn basic welding skills without attending a full-time school if you use reliable instruction, practice consistently, test your work, and stay within safe limits.
Gas-shielded MIG is a practical starting process for many learners working with clean mild steel. Repeat the same joints until you can reproduce them in the positions you need.
Videos, manuals, forums, and books can explain concepts, but they cannot inspect your hand position, joint preparation, or failed coupon. A short hands-on class, community-college course, maker-space program, or session with an experienced instructor can correct problems much faster than trial and error.
BLS notes that welding training may come from technical schools, community colleges, private schools, the military, and on-the-job training. Professional work commonly combines technical instruction with supervised practice.
Certification can help demonstrate skill for paid work, but it is tied to a tested procedure and application. It does not automatically qualify someone for every automotive material or repair.
How to Improve Welds on Car Builds
Improvement comes from controlling the entire repair, not only the arc. Start with material identification and clean surface preparation. Use the process, consumable, joint, and attachment method required for the material. Practice the exact joint on scrap and test it before welding the project.
Understanding wire types and applications can reduce rework, but the wire must also match the machine, polarity, shielding gas, base metal, and repair procedure.
Surface Prep Matters
Strong welds begin with known, clean material and accurate fit-up. Rust, oil, paint, moisture, and seam sealer can weaken the result or make it impossible to inspect.
Remove contamination, deburr the edges, and shape the patch so it rests in position without excessive force. Large or uneven gaps change the heat needed to bridge the joint and increase burn-through risk.
- Strip contamination and coatings from the heat zone.
- Measure and shape the edges for even contact.
- Test-fit and clamp the pieces before final welding.
- Confirm access to inspect the joint and protect the opposite side.
Practice the same fit-up on scrap. A settings test made on a tight lap joint may not transfer to a wide butt-joint gap.
Choose The Right Process
Choose the process from the material, thickness, joint, position, access, and repair information. Gas-shielded MIG is often the easiest starting point for non-structural mild-steel practice.
Use the correct wire, shielding gas, polarity, drive rolls, liner, tip, and settings. Aluminum may require pure argon, suitable filler, dedicated cleaning tools, and a spool-gun or push-pull arrangement. Stainless steel may require different filler and shielding. Structural collision work may call for resistance spot welding, MIG brazing, adhesives, rivets, or another specified attachment.
Do not force the machine you own onto a repair that requires a different process or tool. Change the repair plan or refer the work to a qualified shop.
Practice On Scrap Metal
Use scrap practice to reproduce the real joint, not merely to warm up. Match the material, thickness, overlap, gap, position, access, and weld sequence as closely as possible.
- Practice the required flat, vertical, horizontal, or overhead position.
- Compare settings on measured thin and thick coupons.
- Inspect bead profile and both sides of the joint.
- Perform a destructive test on the disposable coupon.
- Record the successful setup before moving to the project.
Each test should answer a question about fit-up, fusion, heat, access, or repeatability.
Protecting the Repair After Welding
Welding and grinding remove factory corrosion protection. If you leave bare steel, unsealed seams, or exposed cavities, rust can begin around an otherwise sound repair.
- Inspect before coating: Confirm that the weld is complete and that no additional repair or testing is required.
- Clean carefully: Remove loose spatter, abrasive residue, dust, and contamination without thinning the surrounding panel.
- Apply approved primer: Restore corrosion protection with products compatible with the vehicle maker’s procedure and paint system.
- Seal seams: Replace seam sealer in the specified location and thickness after the required primer stage.
- Protect cavities: Apply cavity protection where the repair procedure calls for it, while keeping drains and ventilation paths open.
- Restore coatings: Reapply topcoat, underbody coating, sound-control material, or stone protection as specified.
Do not hide an uninspected weld under seam sealer or filler. Complete the inspection first, then restore the protective layers.
Structural and Frame Welding: What Beginners Should Avoid
Small practice coupons, shop brackets, and suitable non-structural patches can be reasonable beginner goals. Structural welding is different. Frames, unibody rails, pillars, rockers, suspension mounts, subframes, steering parts, seat mounts, seatbelt anchors, roll cages, battery enclosures, and crash-management parts can affect alignment, load paths, or occupant protection.
Warning: Do not use beginner practice welds on structural, restraint, suspension, steering, high-voltage, or crash-related parts. Use the vehicle maker’s current repair procedure and a qualified repair professional with the required equipment, measuring capability, and training.
A weld may look good while lacking fusion, using the wrong filler, overheating high-strength steel, placing a joint in an unapproved location, or weakening nearby material. Mixed-material vehicles may also use adhesives, rivets, spot welds, and restricted heat zones.
Roadworthiness and inspection rules differ by jurisdiction. A repair that appears functional may still violate an inspection rule, manufacturer requirement, racing standard, insurer requirement, or local law.
When to Move From Practice to Projects
You can move from general practice to a small, low-risk project when you can repeatedly prepare, fit, weld, inspect, and test the same joint on matching scrap.
Good first projects may include shop fixtures, practice brackets, removable non-safety-critical tabs, or non-structural patches where failure would not affect steering, braking, suspension, restraint systems, crash performance, battery safety, or road control.
Before starting, confirm the material and repair method, protect both sides from fire, set the machine on a matching coupon, and plan the weld sequence. Understanding heat-control techniques can help reduce burn-through and distortion on thin automotive panels.
Stop and refer the work when you cannot identify the material, cannot obtain the repair procedure, cannot inspect the backside or concealed area, or cannot reproduce the joint on scrap.
How Certification and Pay Work
You do not normally need formal certification to practice beads on your own scrap. Paid work may require employer testing, documented training, a specific welder qualification, a collision-repair credential, or another local requirement.
The AWS Certified Welder program is performance-based. A welder is tested to a defined procedure, process, material, and application. Passing one qualification does not certify every welding process or automotive repair.
BLS reports that welders, cutters, solderers, and brazers had a median annual wage of $51,000 in May 2024, while the highest 10 percent earned more than $75,850. Those figures cover the broader occupation, not automotive welding alone.
Some welders may earn total annual income above $100,000 through specialized work, overtime, travel, supervision, ownership, or high-cost markets, but that is not a typical beginner benchmark and is not established by the BLS median data.
Automotive welding pay depends on repair quality, fabrication ability, training, efficiency, documentation, location, shop type, and the ability to follow vehicle-specific procedures consistently.
Frequently Asked Questions
Can you make $100,000 as a welder?
Some welders may earn more than $100,000 through specialized work, overtime, travel, supervision, business ownership, or high-cost labor markets. It is not a typical beginner automotive-welding income. BLS reports a $51,000 median annual wage in May 2024 and a top-decile threshold above $75,850 for the broader welding occupation.
What’s the hardest type of welding to learn?
Many beginners find TIG difficult because it requires precise torch movement, filler coordination, heat control, and very clean metal. Difficulty also depends on material, position, joint access, and quality requirements. Thin overhead sheet, aluminum, and safety-critical repairs can be difficult with any process.
Do welders have shorter lives?
Welders do not automatically have a shorter lifespan. Welding can expose workers to fumes, metals, burns, ultraviolet radiation, noise, electrical hazards, awkward positions, and fire. Ventilation, source extraction, suitable PPE, training, exposure control, and occupational health monitoring help reduce those risks.
Does automotive welding pay well?
Automotive welding can pay well when it is combined with collision repair, restoration, fabrication, measuring, diagnostics, documentation, and vehicle-specific training. Income varies by location, shop type, productivity, credentials, and the complexity of the work.
Can I weld a car frame at home?
A beginner should not weld a frame, unibody rail, pillar, suspension mount, seatbelt anchor, steering part, battery enclosure, or crash structure at home. These repairs can affect alignment, load paths, and occupant safety. Use the vehicle maker’s procedure and a qualified professional.
Is flux-core welding good for car body panels?
Self-shielded flux core can work for certain materials and jobs, but it is usually less convenient for thin visible body panels because it produces slag, more smoke, and additional cleanup. Gas-shielded solid-wire MIG is often easier to control for clean mild-steel sheet practice.
How long does it take to learn automotive welding?
There is no reliable universal hour count. Basic MIG controls may be learned over several practice sessions, but safe automotive repair requires repeatable joint preparation, positional welding, destructive coupon testing, heat control, material identification, fire safety, and repair-procedure knowledge.
Should I disconnect the car battery before welding?
Follow the exact vehicle maker’s welding and battery-disconnection procedure. Modern vehicles may have battery sensors, backup power, restraint-system waiting periods, multiple batteries, sensitive modules, or high-voltage systems. Do not rely on a single universal terminal-disconnection rule.
Conclusion
Automotive welding is not impossible to learn, but safe vehicle repair requires more than controlling a welding gun. Start with gas-shielded MIG on known mild-steel scrap, prepare every joint carefully, test your practice welds, control fumes and fire, and protect vehicle electronics. Move only to low-risk non-structural projects that match your demonstrated skills. For frames, rails, pillars, restraints, suspension, steering, roll cages, battery structures, hybrids, EVs, and crash-related parts, use the vehicle maker’s procedure and a qualified professional.
Sources
- OSHA 1910.252: Welding, Cutting, and Brazing General Requirements — supports eye protection, fire prevention, combustible control, container precautions, and fire-watch guidance.
- NIOSH: Welding Fumes and Manganese — supports welding-fume, manganese, neurological, and confined-space exposure guidance.
- U.S. Bureau of Labor Statistics: Welders, Cutters, Solderers, and Brazers — supports occupation, training, wage, hazard, and employment information.
- I-CAR: Structural Sectioning Procedures and OEM Repair Information — supports vehicle-specific structural repair, material, attachment, and sectioning requirements.
- I-CAR: High-Voltage Safety for EV Collision Repair — supports OEM training, high-voltage disablement, and electric-vehicle repair precautions.
- American Welding Society: Certified Welder Program — supports performance-based welder certification and procedure-specific testing.




