
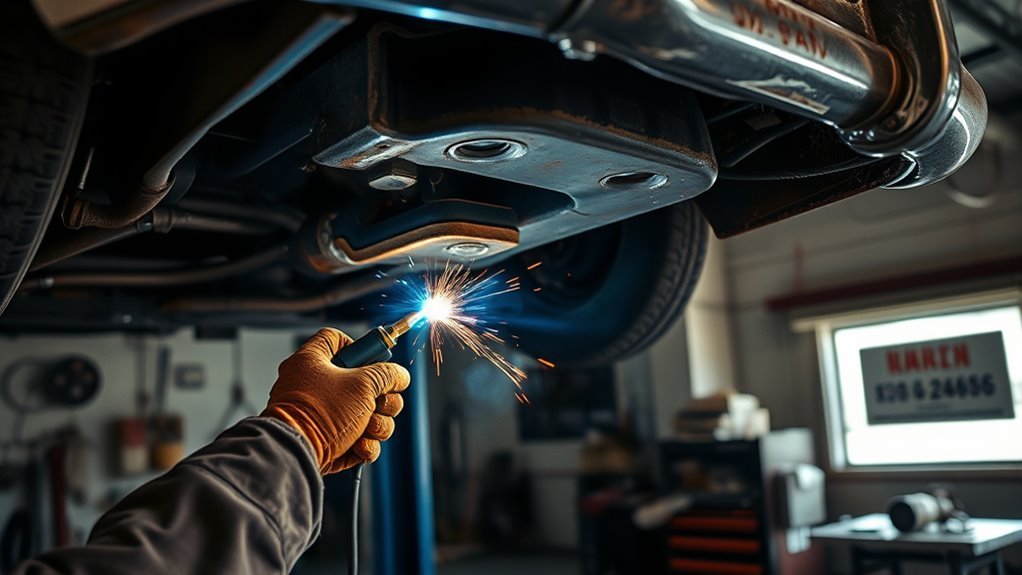
Oxyacetylene welding still has a place in auto repair, especially when you restore thin mild-steel panels on older vehicles. The torch gives you direct control over the flame and produces a weld that an experienced metalworker can shape and planish. However, it also spreads heat across a wider area than many arc-welding processes, so poor fit-up or slow technique can warp a panel quickly. On modern vehicles, always identify the material and check the vehicle maker’s repair procedure before applying heat.
Quick Answer
Oxyacetylene welding in auto repair uses an oxygen-acetylene flame to fuse metal. It is most useful for skilled restoration work on clean, thin mild-steel panels that the vehicle maker does not classify as structural. It is usually unsuitable for modern structural steels unless the OEM repair procedure specifically permits it.
Key Takeaways
- Use oxyacetylene mainly for approved, nonstructural mild-steel restoration work where you can access and protect both sides of the panel.
- Do not assume an outer panel is nonstructural. Identify the material and follow the vehicle-specific body repair manual.
- A neutral flame suits most mild-steel gas welding, but the torch tip, pressures, and filler must match the equipment maker’s chart and the base metal.
- Tight patch fit, spaced tacks, short weld sections, planishing, and natural cooling help control distortion.
- After welding, restore every primer, seam sealer, undercoating, foam, and cavity coating disturbed by the repair.
What’s in This Article
- What Is Oxyacetylene Welding?
- Where Does Oxyacetylene Fit in Modern Auto Repair?
- What Equipment Does an Oxyacetylene Setup Use?
- When Should You Use Oxyacetylene Welding?
- Why Does Oxyacetylene Work on Classic Body Panels?
- Why Must Structural Repairs Follow OEM Procedures?
- How Should You Use Oxyacetylene Welding on Rusty Parts?
- How Do You Prepare the Panel and Patch?
- How Do You Choose the Right Flame, Tip, and Rod?
- What Is the Basic Repair Sequence?
- How Do You Prevent Warping on Thin Panels?
- What Safety Rules Should You Follow?
- How Does Oxyacetylene Help With Classic Cars?
- How Does It Compare With Other Repair Processes?
- How Do You Restore Corrosion Protection?
- Frequently Asked Questions
- Conclusion
- Sources
What Is Oxyacetylene Welding?
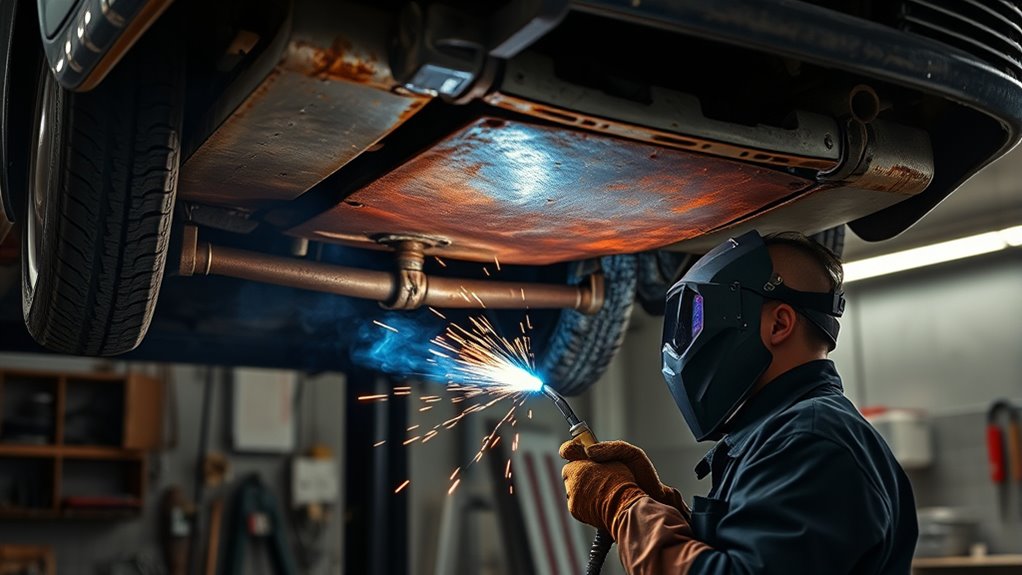
Oxyacetylene welding, also called oxy-fuel gas welding, combines oxygen and acetylene inside a torch to produce a flame hot enough to melt steel. According to TWI’s oxyacetylene safety guidance, the flame can exceed 3,000°C.
The torch melts the edges of the base metal so they fuse as the puddle cools. You may add a compatible filler rod when the joint design, panel gap, or material requires it. This makes oxyacetylene welding different from brazing, where the filler melts but the base metal does not.
You control the flame by adjusting the oxygen and acetylene mixture. The three commonly discussed flame conditions are:
- Neutral flame: A balanced oxygen-acetylene mixture used for most mild-steel gas welding.
- Carburizing or reducing flame: An acetylene-rich flame used only when the material or procedure calls for it.
- Oxidizing flame: An oxygen-rich flame used for limited material-specific applications, not as a general setting for automotive mild steel.
The equipment is portable and does not require an electrical welding power source. However, cylinder storage, transportation, fire prevention, ventilation, equipment inspection, and operator training remain essential.
Where Does Oxyacetylene Fit in Modern Auto Repair?
Oxyacetylene is most relevant to restoration and custom metalwork on known mild-steel panels. Experienced technicians may use it to fuse patch panels, repair small tears, join hand-formed sections, heat-shrink stretched mild steel, or make a weld that can be planished with a hammer and dolly.
Its role is much narrower on modern collision-damaged vehicles. Current bodies can combine mild steel, high-strength steel, ultra-high-strength steel, aluminum, magnesium, composites, adhesives, rivets, factory spot welds, and zinc-based coatings. Heat that is acceptable on one panel can damage the strength, coating, or crash behavior of another.
Warning: Do not identify a panel as nonstructural based only on its location or appearance. Check the vehicle identification, body repair manual, material information, sectioning limits, and approved joining process before heating or welding it.
Before choosing oxyacetylene, answer these questions:
- What material and strength grade is the panel?
- Is the panel part of the occupant safety cell, load path, restraint mounting system, or crash-energy structure?
- Does the vehicle maker allow heat, sectioning, or fusion welding in that location?
- What joining method does the procedure require?
- Can you access the back of the repair to remove combustible material and restore corrosion protection?
The vehicle-specific repair manual, not a generic preference for MIG, TIG, or oxyacetylene, determines the correct process on a structural vehicle part.
What Equipment Does an Oxyacetylene Setup Use?
A complete setup contains more than a torch and two cylinders. Each component must be approved for the gas, pressure, and service involved.
- Oxygen cylinder and regulator: Supplies oxygen at the pressure required by the selected torch tip.
- Acetylene cylinder and regulator: Supplies fuel gas. Acetylene cylinders must remain upright and secured during use.
- Color-coded oxygen and fuel hoses: Carry gas from the regulators to the torch and must be protected from heat, sharp edges, traffic, and hot metal.
- Torch handle and welding tip: Mix and direct the gases. Tip size must match the material thickness and equipment chart.
- Approved backflow and flashback protection: Helps prevent reverse gas flow and flame travel into hoses or upstream equipment.
- Compatible filler rod: Used when the joint cannot be fused autogenously or the repair procedure requires added filler.
- Spark lighter: Lights the torch without exposing your hand to a match or cigarette lighter flame.
- Approved leak-detection solution: Checks connections without using a flame.
- PPE and fire equipment: Includes suitable shaded eye protection, safety glasses, flame-resistant clothing, gloves, protective footwear, and an appropriate extinguisher.
Note: Do not copy pressure settings from a different torch, tip, or online example. Use the chart supplied for your exact equipment. OSHA also states that acetylene must not be used above 15 psig.
Products Worth Considering

Manufactured by Victor, the most recognized Name in Gas equipment

Complete Kit: Ideal for HVAC & Light Duty Brazing - Designed specifically for light-duty brazing and welding jobs, this kit is your go-to tool for HVAC repairs, metal crafts, and other precision tasks. Its portable design is perfect for on-the-go professionals
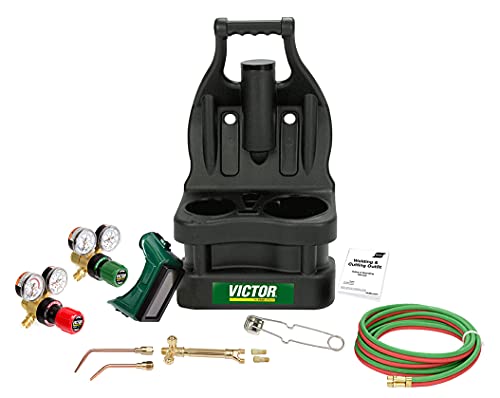
The Portable Tote from Victor features a molded, plastic carrying case with an ergonomic handle and balanced design for easy carrying.
When Should You Use Oxyacetylene Welding?
Use oxyacetylene when the material is known, the repair is permitted, and the advantages of a workable gas-welded joint outweigh the process’s wider heat spread.
Good Candidates
- Classic mild-steel outer panels with no OEM restriction on the repair.
- Hand-formed patch panels that need welding followed by hammer-and-dolly planishing.
- Small nonstructural tears or seams on clean, accessible mild steel.
- Bench repairs on removable mild-steel parts that can be cleaned and protected on both sides.
- Restoration work where the technician has practiced on matching sheet thickness.
Jobs to Avoid
- Frames, rails, pillars, roof rails, rockers, reinforcements, restraint mounts, and other structural parts unless the OEM procedure explicitly permits the process.
- Unknown high-strength or ultra-high-strength steel.
- Heat-sensitive mixed-material assemblies.
- Panels with inaccessible foam, seam sealer, fuel components, wiring, trim, or corrosion protection behind the weld.
- Galvanized or coated panels that cannot be prepared, ventilated, and recoated correctly.
- Any repair beyond the operator’s training or the shop’s hot-work capability.
Classic Body Panel Repairs
Classic vehicles often use relatively simple mild-steel body construction, which can make oxyacetylene suitable for approved outer-panel restoration. The process lets a skilled technician form a small puddle, add filler only when needed, and planish the cooled or partially cooled weld to correct shrinkage.
That does not mean every old panel is safe to weld. Earlier repairs may hide body solder, lead-based coatings, heavy filler, undercoating, seam sealer, brazed joints, or corrosion on the back side. Strip and inspect the repair area before deciding how to join it.
Heat Control for Thin Metal
Thin sheet needs a small tip, accurate fit-up, a short flame dwell time, and a planned weld sequence. A neutral flame helps avoid adding excess oxygen or carbon to a mild-steel puddle, but flame chemistry alone will not prevent distortion.
Keep the puddle small, move as soon as the edges fuse, and stop before the surrounding panel becomes broadly heat-soaked. Practice on scrap steel of the same thickness until you can form and move the puddle without burning through.
Why Does Oxyacetylene Work on Classic Body Panels?
Oxyacetylene can work well on classic mild-steel panels because the operator controls both heat placement and filler addition by hand. A properly made gas weld can remain workable enough for careful planishing, which helps a restorer correct weld shrinkage and bring a panel back to shape.
Other practical advantages include:
- No wire-feed system or electrical welding power source is required.
- The same torch system can support welding, brazing, heating, and metal-shaping tasks when fitted and operated correctly.
- The operator can see the joint edges and add only the filler needed for the puddle.
- There is no arc-wire spatter, although oxidation, scale, and heat damage still require control.
The main tradeoff is heat spread. Oxyacetylene generally heats more surrounding sheet than a well-set MIG or TIG process. It can therefore create severe waves, oil-canning, edge pull, or panel shrinkage when the patch fit, tip size, travel speed, or weld sequence is wrong.
Why Must Structural Repairs Follow OEM Procedures?
Modern structural repairs cannot be reduced to “MIG is better.” Vehicle makers engineer rails, reinforcements, pillars, rockers, roof structures, and safety-system attachments as parts of a crash-management system. Their repair manuals specify where a part may be sectioned, which joints may be duplicated, what heat limits apply, and which joining method must be used.
I-CAR’s summary of current Ford and Lincoln sectioning guidance illustrates this OEM-first approach: the vehicle-specific workshop manual supplies the permitted welding and sectioning joint for the repair.
An approved structural procedure may call for one or more of the following:
- GMA/MIG/MAG plug, slot, butt, or fillet welds.
- Squeeze-type resistance spot welding.
- MIG brazing on specified coated-steel joints.
- Structural adhesive with rivets or other mechanical fasteners.
- Replacement at factory seams.
- A specific weld count, spacing, overlap, or test-coupon requirement.
Oxyacetylene introduces substantial heat and is rarely the default process for a modern structural component. Do not use it unless the applicable procedure clearly allows it.
How Should You Use Oxyacetylene Welding on Rusty Parts?
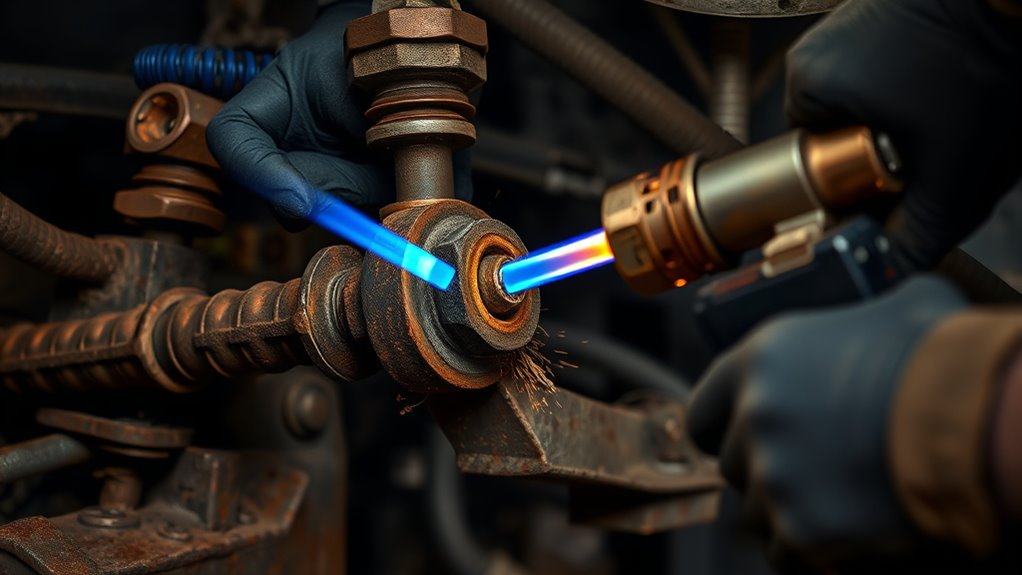
Do not try to fuse rust, scale, thin perforated metal, or contaminated edges. A sound rust repair begins by removing damaged metal until the remaining panel has consistent thickness and strength.
- Inspect both sides of the panel and mark the full extent of the rust.
- Remove trim, wiring, insulation, foam, seam sealer, undercoating, paint, and other combustible or toxic material from the hot-work area.
- Cut beyond soft, pitted, or delaminated metal until the opening is surrounded by sound steel.
- Make a patch from compatible metal with similar thickness and forming characteristics.
- Fit the patch with an even, controlled joint gap suitable for the chosen technique.
- Clean the front and back of the weld zone to bright metal.
- Confirm that you can inspect, clean, prime, seal, and protect the back side after welding.
If the panel is galvanized, remove only the coating required by the repair procedure and keep fumes out of your breathing zone. OSHA places additional ventilation requirements on indoor welding of zinc-bearing material. Review OSHA’s welding, cutting, and brazing requirements, follow the vehicle maker’s instructions, and restore the removed corrosion protection afterward.
You can also review this guide to remove zinc coating from galvanized steel, but the vehicle-specific procedure must take priority on an automotive panel.
How Do You Prepare the Panel and Patch?
Fit-up has a direct effect on heat input and distortion. A large or uneven gap forces you to add more filler and hold the flame on the joint longer. A patch that sits under tension can pull the surrounding panel as soon as the weld shrinks.
Before lighting the torch:
- Shape the patch so it follows the panel contour without being forced into place.
- Keep the joint gap even and appropriate for the chosen welding technique.
- Deburr the cut edges and remove rust, paint, oil, filler, adhesive, and scale.
- Check the back side for hidden combustible material and previous repairs.
- Clamp the patch without flattening or twisting the panel.
- Mark reference points so you can detect panel movement during welding.
- Prepare a matching scrap coupon for flame, filler, and travel-speed testing.
Pro Tip: Spend more time making the patch fit than trying to correct a wide gap with filler rod. Tight, relaxed fit-up lowers the heat needed to close the seam and gives you more control over shrinkage.
How Do You Choose the Right Flame, Tip, and Rod?
Start with the base material, sheet thickness, torch model, and tip manufacturer’s chart. Do not select a tip or pressure by visual guesswork alone.
Products Worth Considering

You do not need flux when brazing with this product

Acetylene Cutting Tips Fit Harris Cutting Torch
The high silicon and manganese content in the product eliminates the need for flux when welding
Flame Selection
Use a neutral flame for most mild-steel fusion welding. The inner cone should be clearly defined without a visible acetylene feather or an aggressively short, hissing oxidizing cone. This balanced-flame guide provides additional adjustment context.
Use carburizing or oxidizing flames only when a verified material procedure calls for one. An incorrect flame can contaminate the puddle, increase oxidation, change bead behavior, or weaken the finished joint.
Tip Selection
Choose the smallest manufacturer-approved welding tip that can form and move a stable puddle on the sheet thickness. An oversized tip heats too much surrounding metal. An undersized tip may force you to dwell so long that total heat input still becomes excessive.
Filler-Rod Selection
Use a clean filler rod compatible with the base metal and the repair procedure. The rod diameter should suit the sheet and puddle size. A rod that is too large chills the puddle and requires extra heat, while excessive filler leaves a bulky bead that needs more dressing.
Some tightly fitted mild-steel seams can be fused without filler, but only when the joint design, material condition, and technician’s skill support an autogenous weld. Test the method on matching scrap before working on the vehicle.
What Is the Basic Repair Sequence?
The exact sequence depends on the panel and equipment, but a controlled mild-steel restoration repair generally follows this order:
- Verify the repair: Identify the vehicle, material, structural status, and permitted joining process.
- Make the area fire-safe: Remove or protect fuel-system parts, trim, wiring, glass, coatings, foam, sealer, sound deadener, and other combustibles.
- Prepare and fit the patch: Use sound, compatible metal with accurate contour and joint fit.
- Inspect the equipment: Check cylinders, regulators, hoses, check valves, flashback protection, torch, tip, and connections.
- Leak-test and set the equipment: Follow the manufacturer’s setup, pressure, purging, lighting, and flame-adjustment procedure.
- Test on matching scrap: Confirm puddle control, filler size, travel speed, penetration, and distortion.
- Tack the patch: Place small, spaced tacks while checking alignment and panel shape.
- Join the seam progressively: Move between separated areas rather than concentrating heat in one location.
- Planish when appropriate: Use controlled hammer-and-dolly work to correct shrinkage without stretching the surrounding panel excessively.
- Allow natural cooling: Stop when the panel becomes broadly hot and let it cool before continuing.
- Inspect and dress the weld: Check fusion, cracks, pinholes, contour, backside condition, and remaining thickness before minimal grinding.
- Restore protection: Reapply every required primer, sealer, coating, foam, and cavity treatment in the OEM-defined order.
How Do You Prevent Warping on Thin Panels?
Warping begins when one area expands and shrinks more than the surrounding sheet. You control it by reducing the heat required at each point and preventing heat from accumulating across the panel.
- Use accurate fit-up: Wide gaps require more heat and filler.
- Choose the correct tip: Use the equipment maker’s recommendation for the material thickness.
- Keep the puddle small: Move as soon as fusion occurs instead of heating a large area.
- Tack in a balanced pattern: Check panel contour after every group of tacks.
- Skip between separated areas: Do not complete a long seam continuously on thin sheet.
- Pause before heat spreads: Let the panel cool naturally when a broad area becomes hot.
- Planish deliberately: Correct weld shrinkage with controlled hammer-and-dolly work when the panel design and access permit it.
- Grind minimally: Excess grinding heats and thins the panel, making distortion harder to correct.
Caution: Do not automatically quench a hot automotive panel with water, a soaked rag, or compressed air. Rapid cooling can create unpredictable shrinkage and may conflict with the material or vehicle maker’s repair limits.
Common Causes of Distortion
| Problem | Likely Cause | Correction |
|---|---|---|
| Panel rises or develops a wave | Too much heat concentrated in one area | Stop, allow natural cooling, recheck shape, and shorten the next weld interval |
| Repeated burn-through | Thin remaining metal, oversized tip, wide gap, or slow travel | Cut back to sound metal, improve fit-up, and retest the tip and travel speed on scrap |
| Bulky bead | Too much filler or poor edge fusion | Use a smaller compatible rod and feed only enough filler to maintain the joint |
| Seam pulls inward | Weld shrinkage without balanced tacking or planishing | Use a balanced sequence and controlled hammer-and-dolly correction where appropriate |
What Safety Rules Should You Follow for Gas Welding?
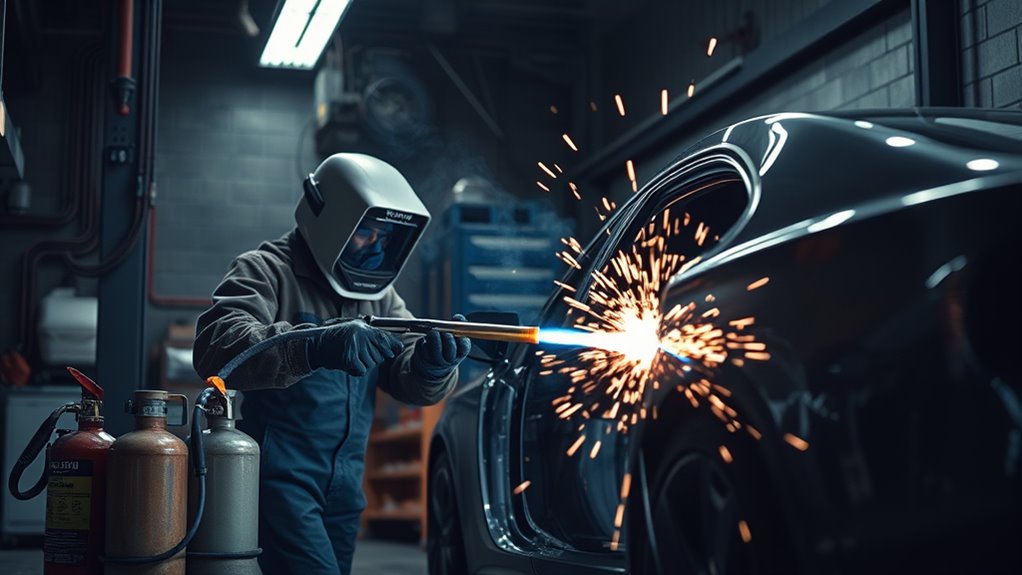
Oxyacetylene combines a highly flammable fuel gas, high-pressure oxygen, open flame, hot metal, and potentially toxic automotive coatings. Treat every job as controlled hot work.
Cylinder and Equipment Safety
- Keep cylinders upright, secured, labeled, ventilated, and protected from impact, sparks, flame, and hot metal.
- Store oxygen cylinders away from fuel-gas cylinders and combustible material. Under applicable OSHA workplace rules, stored oxygen and fuel-gas cylinders require at least 20 feet of separation or an approved noncombustible barrier.
- Keep regulators, valves, fittings, hoses, hands, and gloves free of oil and grease, especially on the oxygen side.
- Use only regulators, hoses, tips, and protective devices approved for the gas and equipment.
- Inspect hoses for cuts, burns, cracking, soft spots, damaged fittings, and leaks.
- Verify that approved backflow and flashback protection is installed as required by the equipment maker and applicable rules.
- Leak-test connections with an approved solution before lighting. Never search for a leak with a flame.
- Light the torch with a spark lighter and follow the manufacturer’s lighting and shutdown sequence.
- Never use acetylene above 15 psig.
OSHA’s full oxygen-fuel requirements cover cylinder handling, storage, approved equipment, pressure limits, and oxygen contamination. Review 29 CFR 1910.253 alongside your equipment manual and local rules.
Automotive Work-Area Safety
- Follow the OEM power-down procedure before working near batteries, high-voltage systems, airbags, restraint wiring, electronic modules, or pyrotechnic devices.
- Locate fuel tanks, fuel lines, brake lines, refrigerant lines, wiring, glass, trim, carpet, insulation, foam, seam sealer, cavity wax, and undercoating near or behind the repair.
- Remove combustible material when possible. Shielding the visible surface is not enough if heat can travel to a hidden cavity.
- Keep the work area ventilated and use local exhaust when coatings, zinc, lead, paint, sealer, or contamination may create hazardous fumes.
- Never weld, cut, or heat a used fuel container or closed cavity unless it has been professionally cleaned, isolated, vented, and approved for hot work.
- Keep suitable fire-extinguishing equipment ready and follow the shop’s hot-work permit and fire-watch requirements.
- Inspect the work area and hidden cavities after welding for smoldering material.
Personal Protective Equipment
- Wear suitable shaded goggles or a gas-welding face shield selected for the flame intensity and task.
- Wear safety glasses with side protection under appropriate face protection.
- Use flame-resistant clothing, leather welding gloves, and protective footwear.
- Keep synthetic clothing, exposed skin, oily garments, and loose items away from the flame.
- Use respiratory protection only as part of a compliant hazard assessment and respiratory-protection program when ventilation alone cannot control exposure.
Warning: Never put oil, grease, thread lubricant, or unapproved sealant on oxygen equipment. Oxygen can cause contaminated material to ignite violently.
What Should You Do After a Backfire or Flashback?
A pop that extinguishes the flame may indicate a backfire. A sustained whistle, squeal, or flame burning inside the equipment may indicate a flashback. Stop using the torch, isolate the gas supplies when it is safe to do so, and follow the equipment maker’s emergency procedure. Do not relight the system until the tip, pressures, hoses, check valves, flashback protection, regulators, and torch have been inspected.
How Does Oxyacetylene Welding Help With Classic Cars?
Oxyacetylene remains valuable in classic-car restoration because many early panels were made from workable mild steel and were repaired with hand-forming techniques. A skilled restorer can shape a patch, fuse the seam, and planish the weld to reduce shrinkage and preserve the panel contour.
It is especially useful when:
- The original panel is worth preserving and contains enough sound metal for a durable repair.
- A hand-formed patch needs a weld that can be worked with a hammer and dolly.
- The panel can be stripped and inspected on both sides.
- The technician has practiced the same joint on matching material.
Older vehicles also present hidden hazards. Previous repairs may contain lead body solder, brazed seams, unknown paint, tar-like sound deadener, heavy filler, or corrosion trapped inside a flange. Identify and remove hazardous material before heating the area.
Portability can help with removable panels or restoration work outside a fixed welding bay, but only in an approved hot-work location with safe cylinder handling, ventilation, shielding, and fire control.
How Does Oxyacetylene Compare With Other Auto-Repair Processes?
No single joining process is best for every automotive repair. The material, joint, access, vehicle maker’s procedure, technician qualification, and available equipment determine the correct choice.
| Process | Typical Automotive Use | Main Strength | Main Limit |
|---|---|---|---|
| Oxyacetylene welding | Approved classic mild-steel panel restoration, small patches, and metal shaping | Manual puddle and filler control; weld can be planished by a skilled operator | Wide heat spread, slower work, and high distortion risk on thin sheet |
| GMA/MIG/MAG | OEM-approved plug, slot, butt, or fillet welds on specified materials | Fast deposition, repeatable setup, and lower total heating than oxyacetylene in many repairs | Incorrect wire, shielding, polarity, settings, or technique can cause weak fusion and excess buildup |
| GTA/TIG | Clean precision welds on suitable steel, stainless steel, or aluminum components | Fine puddle and filler control with little spatter | Slow, cleanliness-sensitive, and skill-intensive |
| Squeeze-type resistance spot welding | Duplicating factory spot welds where the OEM procedure requires it | Replicates factory-style joints with controlled weld parameters | Requires approved equipment, access, electrode selection, and procedure-specific settings |
| MIG brazing | Specified coated-steel and high-strength-steel joints | Lower base-metal melting and reduced coating damage compared with fusion welding | Only appropriate where the OEM procedure specifies the joint and consumable |
| Adhesive and mechanical fastening | OEM-specified bonded, riveted, or mixed-material assemblies | Controls heat and can reproduce factory mixed-material joints | Requires exact products, surface preparation, fasteners, cure conditions, and procedure compliance |
For classic mild-steel shaping and restoration, oxyacetylene can still earn its place. For modern collision repair, choose the process named in the vehicle-specific procedure and confirm that the shop has the equipment, consumables, access, and technician qualification to reproduce the joint.
How Do You Restore Corrosion Protection After Welding?
Heat, cutting, sanding, and welding remove or damage factory corrosion protection. A repair is not complete when the bead has been dressed. The exposed metal, flanges, seams, backsides, and enclosed cavities must receive the protection required by the vehicle maker.
I-CAR’s current corrosion-protection guidance notes that OEM procedures commonly address primer, adhesives, seam sealer, foam, undercoating, and cavity wax. Product order matters because some materials must go over cured primer, some must be applied before assembly, and others are installed after refinishing.
A typical post-weld workflow includes:
- Inspect the front and back of the joint for fusion, cracks, pinholes, contamination, and excessive thinning.
- Remove scale, residue, and only the weld height that must be dressed.
- Clean the area with products approved for the refinishing system.
- Apply the specified primer or metal treatment to exposed surfaces.
- Restore seam sealer, adhesive, foam, sound-deadening material, and undercoating in the locations and order shown by the OEM.
- Apply cavity wax or other enclosed-section protection after refinishing when the procedure requires it.
- Reinstall trim and components only after coatings have cured and the repair has passed its final inspection.
Note: Do not drill unapproved access holes solely to apply cavity protection. Use existing access points or the method specified in the body repair manual.
Frequently Asked Questions
When would you use oxy-acetylene welding in auto repair?
Use it mainly for approved mild-steel restoration work, small nonstructural patches, hand-formed classic panels, and repairs that benefit from planishing. Confirm the material, structural status, backside access, and vehicle maker’s repair limits before applying heat.
What is the acetylene cylinder withdrawal-rate rule?
Current ESAB guidance describes a commonly used limit of one-seventh of the cylinder’s capacity per hour. However, cylinder design, supplier instructions, and duty cycle can affect the permitted rate. Follow the cylinder supplier and equipment manufacturer, and never use acetylene above 15 psig.
Can you use oxyacetylene welding on modern car frames?
Do not use oxyacetylene on a modern frame, rail, reinforcement, pillar, rocker, or other structural component unless the vehicle-specific repair procedure explicitly permits it. Modern structures may require spot welding, GMA welding, MIG brazing, adhesive bonding, riveting, or replacement at factory seams.
Does oxyacetylene welding warp auto body panels?
Yes, it can. The process heats a relatively wide area, and thin sheet expands and shrinks quickly. Accurate fit-up, the correct tip, a small puddle, balanced tacking, short separated weld sections, planishing, and natural cooling help limit distortion.
Should you weld directly over rust?
No. Remove rust, scale, thin metal, contamination, and coatings until the joint is surrounded by sound metal. Fit a compatible patch and weld only clean edges that have enough thickness to support a durable repair.
Can you oxyacetylene weld a galvanized car panel?
Only when the vehicle maker allows the repair and you can control coating fumes and restore corrosion protection. Remove the required coating from the weld zone, use suitable ventilation or local exhaust, keep fumes out of your breathing zone, and reapply the specified protective system after welding.
Is oxyacetylene welding the same as brazing?
No. Oxyacetylene fusion welding melts the base-metal edges and may add compatible filler. Brazing heats the joint but does not melt the base metal; a lower-melting filler flows between or across the prepared surfaces.
Can you use oxyacetylene on aluminum body panels?
Aluminum can be gas welded with specialized preparation, flux, filler, flame control, and considerable skill, but that does not make it suitable for a modern vehicle panel. Follow the OEM repair manual, which may require TIG, MIG with approved equipment, adhesive bonding, riveting, or complete panel replacement.
Safety Disclaimer: This article is for informational purposes only and does not replace hands-on training, equipment manuals, workplace hot-work rules, local regulations, or vehicle maker repair procedures. Oxy-fuel equipment, compressed gases, automotive coatings, structural materials, and hidden combustibles can cause fire, explosion, toxic exposure, property damage, serious injury, or death when handled incorrectly.
Conclusion
Oxyacetylene welding can be useful for skilled restoration work on known mild-steel panels, particularly when a patch must be shaped and the finished weld will be planished. Its controllable flame and portable equipment do not eliminate its main limitation: the process puts substantial heat into thin sheet and can distort a panel quickly.
Do not select oxyacetylene, MIG, TIG, spot welding, brazing, adhesive, or mechanical fastening by habit. Identify the material and structural role of the part, then follow the vehicle-specific repair procedure.
Before welding, prepare sound metal, remove hidden hazards, inspect and leak-test the equipment, practice on matching scrap, and control the weld sequence. Afterward, inspect both sides of the joint and restore every corrosion-protection layer disturbed by the repair.
Sources
- OSHA 29 CFR 1910.253: Oxygen-Fuel Gas Welding and Cutting — acetylene pressure, approved equipment, cylinder storage, oxygen cleanliness, and handling requirements.
- OSHA 29 CFR 1910.252: General Welding, Cutting, and Brazing Requirements — fire prevention, eye protection, ventilation, zinc-bearing materials, and hot-work precautions.
- TWI: Oxyacetylene Welding, Cutting and Heating — process temperature, cylinders, regulators, hoses, eye protection, backflow prevention, and flashback safety.
- ESAB: Understanding the 1/7th Rule for Acetylene — current manufacturer guidance on cylinder withdrawal rate.
- I-CAR: Structural Sectioning Procedures, Ford/Lincoln Update — OEM-specific structural definitions, sectioning limits, and required joining procedures.
- I-CAR: Corrosion Protection Guidelines, Ford/Lincoln Update — restoration of primer, seam sealer, adhesives, undercoating, foam, and cavity protection.




