To weld in the horizontal position, maintain a slight upward angle of 15-20 degrees on the electrode and use a whip motion for better puddle control. Make sure your workpiece is clean and securely positioned with edges aligned at a 90-degree angle. Adjust your machine to 90-100 amps for a 1/8 inch E610 electrode. Keep practicing these techniques to overcome challenges and enhance your skills. There’s much more to explore on perfecting your horizontal welding technique.
Understanding Horizontal Welding Techniques
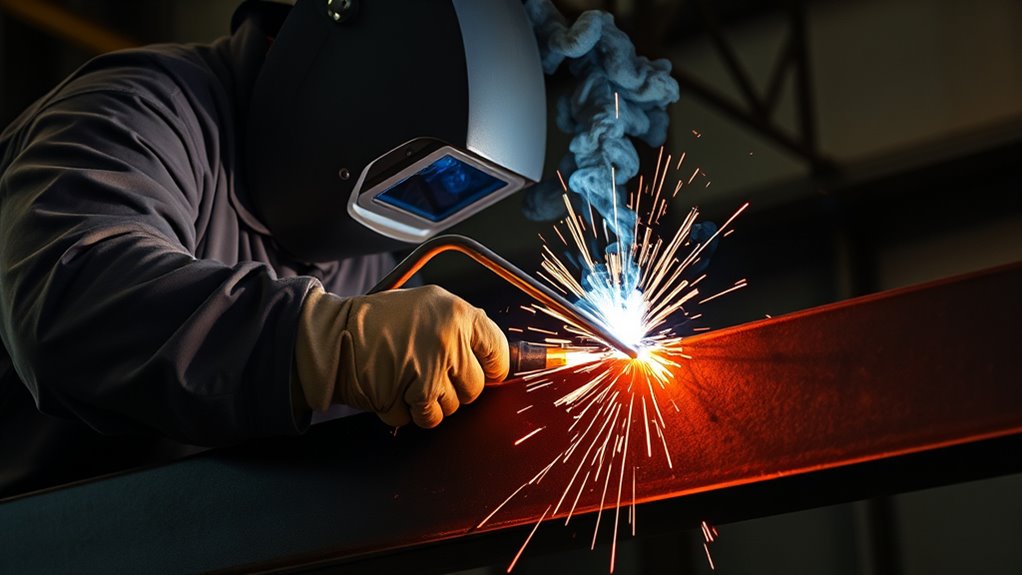
When you’re welding in the horizontal position, understanding the techniques involved is vital for achieving strong, quality welds. Start by maintaining a slight upward angle of 15-20 degrees on your electrode. This helps counteract gravity and guarantees a stable molten puddle.
Using a whip motion while welding allows you to control that puddle effectively, preventing excessive buildup or sagging.
Using a whip motion while welding effectively controls the molten puddle, preventing buildup and sagging for stronger welds.
It’s essential to overlap your weld beads by at least half; this enhances the strength and integrity of the joint. When you first start the weld, position yourself slightly ahead of your intended area to preheat the electrode, facilitating a smooth shift into the weld itself.
Always monitor your weld quality, adjusting your arc force and amperage as needed to maintain a consistent appearance. By following these techniques, you’ll create welds that aren’t only beautiful but also structurally sound. Additionally, be aware of potential lack of fusion as it can compromise weld integrity, especially in horizontal positions.
Preparing the Workpiece for Effective Welding
Achieving strong welds in the horizontal position starts with proper preparation of your workpiece. First, verify your cruciform workpiece is clean and free of contaminants; this promotes strong adhesion and a quality weld.
Next, position the workpiece securely to prevent any movement during the welding process, as this can lead to inconsistent welds. Make sure the edges of the workpieces are aligned at a precise 90-degree angle for uniform weld penetration.
Utilize clamps or fixtures to stabilize your setup while welding in the horizontal position. This stability allows the molten puddle to solidify evenly, guaranteeing a stronger bond.
Finally, check the thickness of your material and adjust your amperage settings within the recommended range of 80-120 amps for best results. Additionally, ensure that the metal is thoroughly cleaned to prevent issues like porosity from contaminants, which can weaken your weld. Taking these steps will lead to effective welding, helping you achieve the liberation that comes with mastering your craft.
How to Set Up Your Welding Equipment Right
Set up your welding equipment correctly to guarantee a smooth and efficient process.
Begin by adjusting your welding machine to the appropriate amperage for the E610 electrode, ideally between 90-100 amps for thicker material. Choose a 1/8 inch electrode size to optimize performance in the horizontal position.
Position the electrode at a slight upward angle of 15-20 degrees. This helps combat gravity and keeps a stable molten puddle while you work.
Position the electrode at a 15-20 degree upward angle to counter gravity and maintain a stable molten puddle.
Confirm your grounding clamp is securely attached to minimize electrical resistance, promoting a stable arc during stick welding.
Don’t forget to wear a suitable welding helmet and protective gear to shield yourself from sparks and ultraviolet radiation. This preparation not only enhances your safety but also supports your liberation in mastering the horizontal welding technique, allowing you to work confidently from the bottom to the top. Additionally, ensure your amperage settings are suitable for the thickness of the material you are welding.
Products Worth Considering
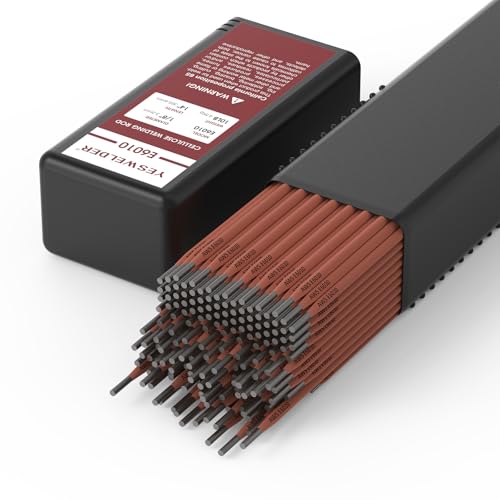
MODEL: E6010 is a mild steel, all-position electrode designed specifically for DC power sources. It delivers deep penetration with a forceful arc and features fast-freezing slag. This rapid solidification characteristic makes it suitable for operation in any position

Product Introduction: E6013 welding rod is suitable for both AC and DC applications and can be used for all position welding

AWS A 5.1-04 : E7018
Selecting the Right Electrode for Your Project
Choosing the right electrode for your welding project is crucial for achieving strong, durable joints. For horizontal position welding, consider these key points:
- Electrode Types: The Lincolnelectric E610 is highly recommended.
- Material Compatibility: Confirm the electrode matches the materials you’re working with for best results.
- Amperage Selection: Use an E610 electrode with an amperage range of 80-120 amps, typically set between 90-100 amps for thicker materials.
Maintaining a slight upward angle of 15-20 degrees while welding helps control the molten puddle, counteracting gravity. Additionally, using the right gas can significantly improve the overall quality of the weld.
Remember, overlapping weld beads by at least half enhances the joint’s strength and integrity.
By selecting the right electrode, you’re setting yourself up for success in your horizontal welding projects.
Be sure to take these factors into account for effective and lasting welds.
Products Worth Considering


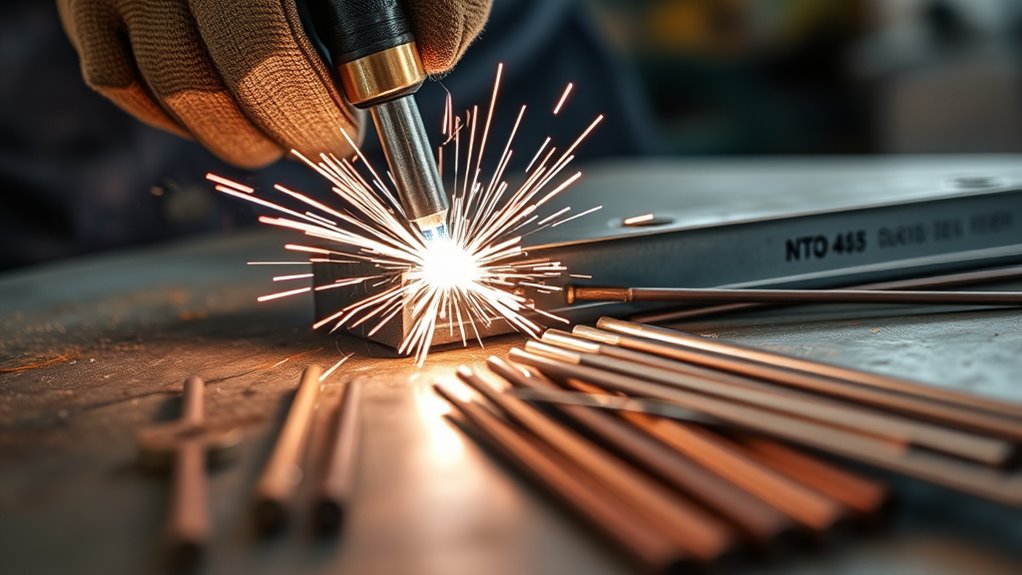
Applications include joining and surfacing parts in marine/seawater environments

Welding Rod Introduction:The 6013 Welding Rods for seamless AC/DC operation, including low-voltage units. Engineered for superior all-position welding (flat, horizontal, vertical, overhead) with stable arc ignition, low spatter, and strong seams. Ideal for workshops, farms, and job sites on mild & low-alloy steel
Mastering the Upward Motion Technique
Master the upward motion technique to enhance your horizontal welding skills. By maintaining a slight upward angle of 15-20 degrees with your electrode, you’ll effectively counteract gravity and achieve strong welds. Incorporate a whipping motion to enhance puddle control, allowing for better penetration and a clean bead appearance. Overlapping your weld beads by at least half is essential for strengthening the joint. Remember, sizing your welds according to the thinner plate will help ensure structural integrity.
| Technique | Importance |
|---|---|
| Upward Motion | Counteracts gravity |
| Puddle Control | Improves weld quality |
| Overlap Beads | Enhances joint integrity |
Start by heating the electrode ahead of the weld area, ensuring smooth changes and preventing defects. Continuously monitor your welding consistency, adjusting your technique to maintain a 90-degree angle to the floor. Mastering these elements will liberate your skills and elevate your welding game.
Achieving the Ideal Electrode Angle
When welding in the horizontal position, achieving the ideal electrode angle is essential for best results. A slight upward angle of 15-20 degrees helps maintain electrode stability, counteracting gravity’s effects. This angle promotes a stable molten puddle, ensuring better penetration and fusion of your materials.
- Monitor your angle consistently for even weld bead consistency.
- Make regular angle adjustments to prevent sagging and overlap weld beads by at least half.
- Practice frequently to enhance your overall technique and weld quality. Additionally, maintaining the correct arc length is crucial for achieving optimal weld quality.
Controlling the Weld Puddle With Precision
To control the weld puddle effectively, keep your electrode at a slight upward angle of 15-20 degrees. This angle helps counteract gravity and allows for better manipulation of the molten puddle using a whipping motion. Mastering these techniques will enhance your precision and guarantee a strong, stable weld. Additionally, understanding joint preparation is crucial for achieving optimal results in your welding projects.
Upward Electrode Angle
Achieving the right upward electrode angle is essential for controlling the weld puddle with precision. By maintaining a slight upward angle of 15 to 20 degrees, you can effectively counteract gravity effects and stabilize the molten puddle.
- Maximize upward angle benefits for stronger welds.
- Utilize effective electrode positioning techniques.
- Monitor arc force closely for ideal puddle control.
This precise angle not only helps in managing the weld pool but also guarantees you maintain a 90-degree angle to the floor for quality formation.
Regularly check your positioning and make adjustments as needed. With practice, you’ll find that the right upward angle considerably enhances your welding control and the integrity of your welds.
Whipping Motion Technique
Mastering the whipping motion technique is essential for controlling the weld puddle with precision in horizontal welding. This slight oscillation of the electrode allows you to manage weld puddle dynamics effectively, ensuring better penetration and bead appearance. Maintain a 15-20 degree upward angle to counteract gravity and stabilize the puddle. This technique also enables overlapping weld beads by at least half, enhancing joint strength. Regular practice will improve your bead consistency techniques, while monitoring the arc force is vital to avoid an overly fluid or solidified weld puddle.
| Technique | Description |
|---|---|
| Whipping Motion | Oscillation of the electrode for control |
| Upward Angle | 15-20 degrees to stabilize the weld puddle |
| Overlapping Beads | Enhancing joint strength through bead overlap |
| Regular Practice | Improving consistency and quality in welds |
| Arc Force Control | Preventing too fluid or solidified puddle |
How to Overcome Common Welding Challenges?
While welding in the horizontal position can present various challenges, there are effective strategies to overcome them. Here are some troubleshooting tips to help you navigate common mistakes:
- Maintain a slight upward angle of 15-20 degrees on the electrode to counteract gravity.
- Use a whipping motion to control the weld puddle and prevent overheating.
- Overlap weld beads by at least half for enhanced strength.
Start your weld slightly ahead of your intended area to preheat the electrode, which improves arc stability.
Continuously monitor the quality of your weld and adjust the amperage between 90-100 amps for thick materials, ensuring you stay within the recommended amperage range for 1/4 inch steel.
Regular equipment maintenance is essential to avoid defects and guarantee peak performance.
Ways to Improve Your Welding Skills
To improve your welding skills, practice regularly and focus on specific techniques. After each session, analyze your results to identify areas for improvement. This consistent approach will help you refine your abilities and achieve stronger, more reliable welds. Additionally, understanding flux core MIG welding principles can significantly enhance your technique and results.
Practice Regularly
Consistently practicing your welding skills is essential for becoming proficient in the horizontal position. Regular drills will help you master techniques that enhance your control and weld quality.
Focus on the following:
- Use the E610 electrode with a slight upward angle (15-20 degrees) to combat gravity.
- Implement a whipping motion to maintain control over the molten puddle.
- Overlap your weld beads by at least half for stronger joints.
Always prioritize welding safety and conduct routine electrode maintenance to guarantee peak performance.
Regular practice won’t only improve your technique but also build your confidence. Monitor your welds during practice sessions to identify areas for improvement, making each session a stepping stone toward mastery.
Analyze Your Results
Analyzing your welds is essential for improving your skills in the horizontal position. Start with weld inspection methods to assess your work regularly.
Focus on bead consistency evaluation; guarantee your weld beads overlap by at least half for enhanced strength. Experiment with your amperage, ideally between 90-100 amps for 1/8 inch E610 electrodes, to find the right heat for your material thickness.
Maintain a slight upward angle of 15-20 degrees to control the molten puddle effectively. Utilize defect identification techniques to spot issues early, adjusting your whipping motion as needed.
Engage in consistent practice and seek feedback during community events like Weld Fever Wednesdays to refine your skills and learn from others.
Advanced Techniques for Horizontal Welding
When you’re welding in the horizontal position, mastering advanced techniques can greatly enhance the quality of your welds. Here are some key strategies to keep in mind:
- Maintain a slight upward angle of 15-20 degrees with the electrode to counteract gravity.
- Use a whipping motion to enhance arc force and stability for better control of the molten puddle.
- Overlap your weld beads by at least 50% to guarantee strong joints.
Start your weld by heating the electrode slightly ahead of the intended area, establishing a strong arc before moving into the weld.
Focus on continuous electrode maintenance to keep your weld bead consistent and clean.
Also, regularly check for proper joint alignment, making adjustments as needed. Additionally, practicing on scrap pieces can help you refine your technique and avoid wasted materials in your projects.
These techniques won’t only improve the integrity of your welds but also empower you to tackle more complex projects with confidence.
Frequently Asked Questions
What Welding Position Is Horizontal?
The horizontal welding position involves welding on a flat surface with the weld axis parallel to the ground. Use proper horizontal welding techniques, guarantee correct equipment setup, and follow safety precautions for ideal results.
Can You Run 7018 Horizontally?
Yes, you can run 7018 horizontally. Despite concerns about sagging, proper technique and safety measures guarantee success. Maintain control of the puddle, use the right amperage, and overlap beads for strong, reliable welds.
What Is the Hardest Position to Weld In?
The hardest position to weld in is overhead. You’ll face gravity challenges that affect weld puddle control. Employ proper welding techniques, prioritize safety precautions, and understand position advantages to improve your results considerably.
What Is the Primary Challenge When Welding in Horizontal Position?
Welding in the horizontal position challenges you to master molten metal control. Employ effective welding techniques, guarantee thorough joint preparation, and always follow safety precautions to maintain a steady hand and achieve a strong bond.
Conclusion
To sum up, mastering horizontal welding is like finding the perfect groove in a classic vinyl record. By understanding techniques, preparing your workpiece, and selecting the right equipment, you’ll enhance your skills greatly. Don’t shy away from challenges; instead, embrace them as opportunities to improve. With practice and precision, you’ll not only produce strong welds but also gain confidence in your abilities. So, roll up your sleeves and get ready to create some impressive work!


