What Is a Tack Weld?
What’s in This Article
Small welds can decide whether your final joint stays straight or pulls out of shape. A tack weld gives parts a short hold before you make the final weld. You use it to control fit-up, spacing, and alignment without adding too much heat too soon. This guide explains how tack welds work, when to use them, and how to avoid common problems.
Quick Answer
A tack weld is a short weld that holds parts in place before the final weld. You use it to check alignment, control gaps, and reduce movement. Good tack welds stay small, clean, and compatible with the final weld.
Key Takeaways
- Use tack welds to hold parts in position before final welding.
- Keep tack welds small enough for the final weld to consume.
- Match the tack weld filler and process to the final weld.
- Control heat so the parts stay aligned and do not warp.
- Clean, inspect, and place each tack before you make the final pass.
What Is a Tack Weld?
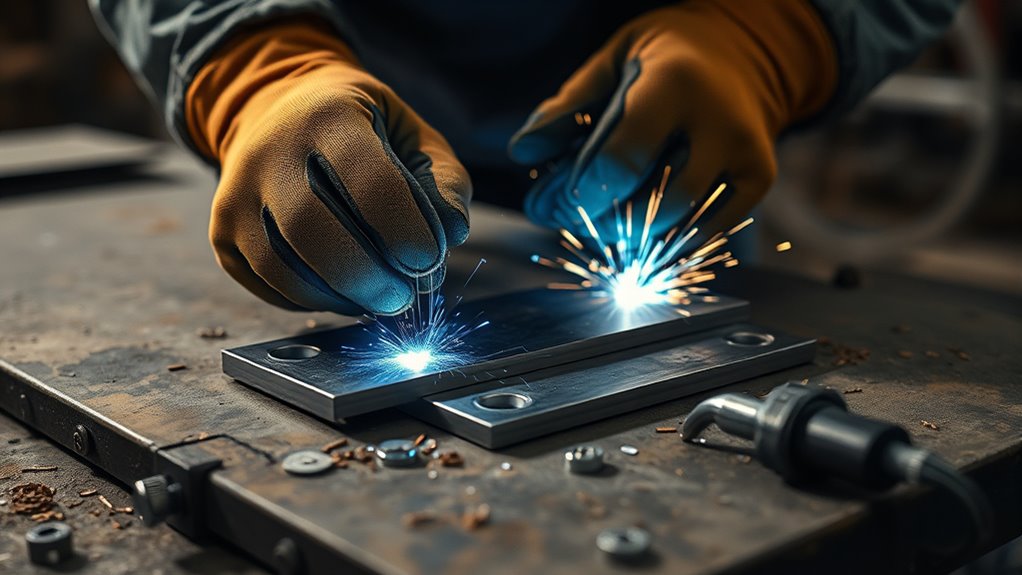
A tack weld is a short weld that holds parts in position before the finished joint. You use it as a temporary hold, not as the main source of strength.
Most tack welds run about 1/2 inch to 3/4 inch long, but the right size depends on joint design and material thickness. The final weld should consume sound tacks so the finished joint stays continuous. Match the filler and base metal to the job so the tack does not weaken the result.
You can use different tack weld techniques, including standard, bridge, hot, and square tacks. Each tack gives you controlled placement while you keep the assembly accurate. In practice, tack welding helps you keep parts stable, protect dimensional accuracy, and move toward a clean final assembly with proper grounding of workpieces for safety and weld quality.
How Tack Welding Works
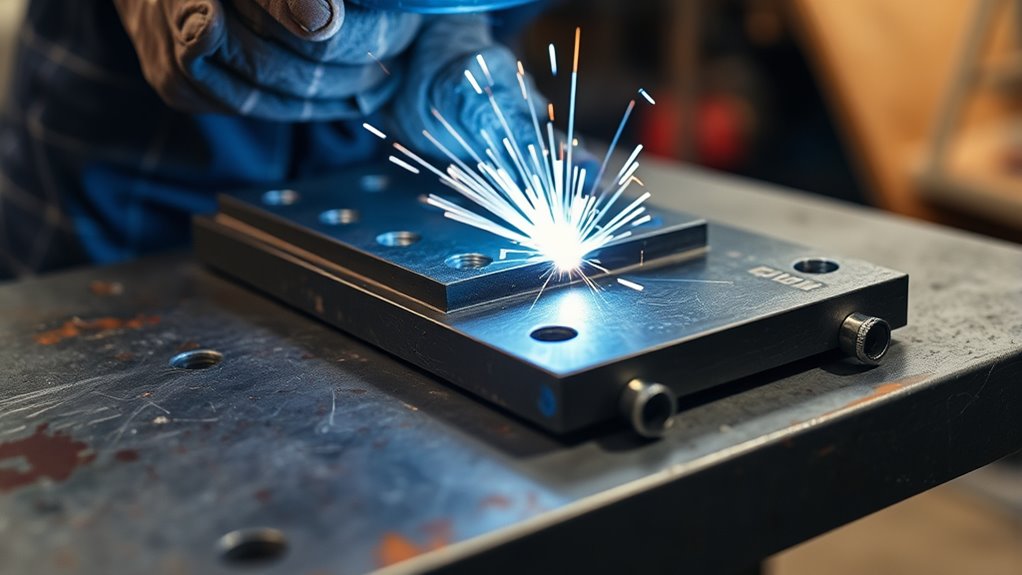
When you tack weld, you place short welds to hold parts in position while you assemble the joint. You usually use the same filler and process as the final weld, so the tack stays compatible with the finished joint.
Use lower heat input than you would use for full welding. This helps limit distortion, preserve fit-up, and protect the base metal from overheating.
Place tacks at controlled intervals so they act as temporary fixtures. They lock alignment, gap, and orientation without removing your ability to make small adjustments.
Good tack weld technique also includes cooling control. Fast cooling can create brittle zones and defects in the heat-affected area. Clean tacks help the assembly stay stable, and they make the final weld easier to complete with less correction.
Proper tack weld sizing also helps maintain structural integrity and reduce issues during the final welding process.
When to Use Tack Welds
You use tack welds before final welding when you need to lock in fit-up, alignment, and part position. They help you control joint gaps, correct spacing, and limit distortion, especially when the assembly still needs adjustment.
In low-volume assembly work, they give you a fast and stable way to hold parts without making permanent joints too early. After the final weld consumes or replaces them, tack welds can support the quality and integrity of the finished assembly.
Products Worth Considering

Value Pack: The package includes 24 packs of butt welding clamps, enough quantity to meet your daily needs and replacements. Each butt welding clamps is individually wrapped in a small bag, convenient to carry and use.

16-Pack Welding Clamps Set: Includes 16 butt welding clamps designed for precise edge-to-edge welding, ideal for body repair, floor patching, door skins, and sheet metal alignment.

Heavy-Duty 304 Stainless Steel:Built for durability with corrosion-resistant stainless steel, ideal for high-temperature exhaust fabrication and industrial welding
Fit-Up Before Final Welding
Before final welding, tack welds hold workpieces in precise alignment during fit-up. They preserve joint gaps and reduce distortion while you make small adjustments.
Clamp the parts, verify fit with alignment tools, and use joint preparation techniques to keep edges consistent before you commit. Small tacks, often about 1/2 to 3/4 inch long, secure the assembly without locking you into a poor fit.
Place tacks at lower power to limit heat input and protect the joint from warping. As the layout stabilizes, the tacks help you confirm that every component seats correctly.
Final welds can then consume clean tacks and leave a continuous joint with better integrity. This approach gives you control, flexibility, and cleaner results.
Gap Control and Alignment
Tack welds help control gap and alignment during assembly. They hold parts in their correct positions until final welding.
Use them after you check gap measurements and apply alignment techniques that keep the joint square and true. Standard tacks go within the joint, where they resist movement and preserve a tight fit for the final weld.
If you need to span a separation, bridge tacks alternate between both pieces and help stop the gap from opening further. This control reduces distortion and warping by keeping heat effects localized and geometry stable.
Place each tack deliberately. Poor placement or excess heat can create defects that weaken the finished joint.
Low-Volume Assembly Applications
In low-volume assembly, tack welds often work well because they hold parts temporarily and still leave room for adjustment. You get precise alignment without making a permanent joint too soon.
That flexibility matters in custom builds, prototypes, and complex fabrications.
- They provide temporary holding for fit-up and rework.
- They help you maintain joint gaps and reduce distortion.
- They lower fixture needs in short-run production.
- They let you reposition components before final welds.
In automotive and aerospace work, these tack weld benefits support cleaner assembly and stronger final structures. When you need control, speed, and less tooling, tack welds give you an efficient path forward.
Standard Tack Weld vs. Bridge Tack Welds

You use a standard tack weld to hold fit-up and alignment, and the final weld should consume it. You use a bridge tack weld when a gap exists between parts.
With a bridge tack, you place small alternating tacks on each piece without tying into the root. The key difference is simple: standard tacks support the joint, while bridge tacks control spacing and help prevent heat from widening the gap. Proper preheating techniques can also reduce the risk of cracking in some materials.
Products Worth Considering

7 inch long with 1-3/4 inch jaw opening.

【Package】 Hiceeden metal face clamps includes 4 C-type clamps, each with a size of 6.6" L * 3.2" W. The maximum object thickness that can be clamped by the jaw is 1.8". It is very suitable for clamping certain parts for welding, riveting, punching, grinding, cutting and other processing. It is an ideal welding clamp for desktop tools.

【High Quality Materials】The main body of the cast iron welders angle clamp is made of high-quality cast iron and steel materials, with high tensile strength and more durable characteristics. The surface of the welding table clamp is sprayed with plastic to prevent rust and corrosion.
Standard Tack Weld Basics
A standard tack weld sits within the joint and should be consumed by the final weld. It helps hold parts in proper alignment during fit-up and welding.
You use it to lock geometry, not to bridge gaps. Your joint preparation and tack weld technique should stay deliberate and clean.
- Place tacks in the joint.
- Match tack size to material thickness.
- Keep heat input controlled.
- Verify alignment before the final pass.
This approach keeps the assembly stable, preserves joint integrity, and supports a smooth root.
Unlike bridge tacks, standard tacks stay inside the weld path and do not create extra edge buildup. You get a precise setup that helps you work with confidence.
Bridge Tack Weld Purpose
Bridge tack welds serve a different job than standard tacks. They span a gap between pieces rather than sit inside the joint.
You use them when fit-up leaves space that you cannot close right away. With bridge weld techniques, you place alternating small tacks across the opening to hold the parts in position without tying into the root.
This gives you temporary stabilization and preserves room to adjust alignment before final welding. As gap stabilization methods, bridge tacks help control movement while you prepare the assembly.
Keep heat input low and balanced. Too much heat can pull the opposite side and widen the gap.
Unlike standard tacks, bridge tacks do not support final joint consumption. Treat them as controlled, temporary supports only.
Key Differences and Uses
Standard tack welds sit within the joint and should be consumed by the final weld. They hold parts in alignment while you complete the root and fill passes.
Use standard tacks when fit-up is correct and you need stable positioning. Use bridge tacks for open gaps when you need temporary control before the root pass.
- Standard tacks usually measure about 1/2 to 3/4 inch long.
- Bridge tacks control gaps without root penetration.
- Standard tacks stay in place until the final weld consumes them.
- Bridge tacks may need grinding after the root pass.
Choose tack weld techniques and tack weld materials to match joint geometry, control distortion, and preserve alignment.
Hot Tack Welds and Square Tack Welds
Hot tack welds use extra filler metal and light hammering to close gaps quickly. You must control heat carefully to avoid overheating, distortion, and base-metal defects.
Use a hot tack when you need to bridge a gap fast and hold parts in alignment before the final weld. Keep your arc short and your heat input low enough to prevent warping. Proper amperage settings help you create a stable arc and reduce defects.
A square tack weld gives you a strong temporary hold for right-angle joints. You place it at corners and edges when you need structural stability and precise alignment.
Because a square tack carries more load than a simple tack, you must position it accurately and manage heat. This helps the joint stay clean and true.
Both methods serve as temporary fixtures. They stop movement, limit distortion, and let you work with control instead of force.
Warning: Do not use oversized hot tacks to force a bad fit, because excess heat can pull the joint out of line.
Tack Welding Different Metals
Tack welding works on steel, aluminum, stainless steel, and copper. You need to match your technique to the metal if you want a sound temporary joint.
Steel is usually more forgiving than many other metals. Galvanized steel needs special care because zinc coating can create toxic fumes when heated. Remove coating from the weld zone and use proper ventilation before welding.
For thinner steel, keep heat low because burn-through can ruin alignment fast. Aluminum needs quick, controlled tacks because it moves heat quickly and can lose shape with too much heat.
Stainless steel can build heat and distort, so you need tight control and clean surfaces. TIG welding offers precise control over arc and heat input, which helps maintain quality.
Copper needs more heat input and careful timing because it pulls heat away quickly.
- Steel: verify fit-up and surface cleanliness.
- Aluminum: use brief, precise tacks.
- Stainless: limit distortion with minimal heat.
- Copper: compensate for rapid heat loss.
Match your tack weld method to the metal, and you keep the joint ready for the next step without losing control.
How to Make Strong Tack Welds
Strong tack welds start with accurate fit-up. Clamp and align the workpieces before you strike an arc.
You control joint strength by keeping parts square and steady. Misalignment can weaken the finished joint and create more rework.
Set your machine to low heat and keep input below your final weld setting. This helps limit distortion and improve weld quality.
Use the same filler material that you plan to use later. This helps the tack match the finished joint and stay compatible under load.
Set your machine to low heat and keep input below your final weld setting for better control and less distortion.
Make each tack about 1/2 inch to 3/4 inch long when that size suits the joint. That range often gives enough restraint without adding excess stress.
Place tacks where they support the assembly and preserve access for the final pass. Let each tack cool at a controlled rate, because rapid cooling can harden the heat-affected zone and reduce toughness.
When you tack aluminum, remove the oxide layer first to reduce contamination. Understanding the oxide layer helps you prepare aluminum before tacking and final welding.
Pro tip: Tack opposite sides in sequence when possible so heat pulls the assembly more evenly.
Common Tack Welding Problems to Avoid
Even a well-planned tack weld can fail if you do not control heat, fit-up, and surface condition. Watch for tack weld defects that reduce welding quality and weaken the assembly.
Keep each tack small, clean, and accurately placed so it supports the joint without distorting it. If you rush, you trade precision for rework.
- Excess heat can warp parts and pull the joint out of line.
- Poor alignment can create weak tacks and uneven load transfer.
- Dirty metal can block fusion, so remove rust, oil, and scale first.
- Oversized tacks can interfere with penetration and final bead continuity.
You should also manage cooling. Fast cooling can create cracks or brittle zones in the heat-affected area.
When you control fit-up, cleanliness, heat input, and cooling rate, you protect welding quality and keep the joint ready for the final pass. Understanding heat control techniques also helps you create strong and uniform welds.
Tack Welding Pros and Cons
Although tack welding is only a temporary step, it gives you a fast, adjustable hold before the final weld. You can use tack welding techniques to lock position, control fit-up, and reduce distortion while you work.
That makes tack weld applications valuable in fabrication, repair, and low-volume production, where speed and cost control matter. You also gain a cleaner final weld because the parts stay aligned and warping stays limited.
Still, tack welds have limits. They are weaker than permanent welds, so you should not rely on them for service loads.
If you place them poorly or run them with bad heat control, you can create residual stresses that later cause distortion or cracking. A lack of fusion in tack welds can also compromise the strength of the final weld.
For that reason, you need disciplined execution, proper spacing, and inspection. Used well, tack welding supports precision and efficiency. Used poorly, it can undermine the weld you are trying to build.
Frequently Asked Questions
Is a Tack Weld Permanent?
No, you should not treat a tack weld as permanent. Use it as a temporary hold, then complete the final weld so the finished joint can carry the load.
Can You Weld Over a Tack Weld?
Yes, you can weld over a sound tack weld when it matches the final weld process and filler. Clean the tack first, control heat, and make sure the final weld fully ties into the joint.
How Long Should a Tack Weld Be?
Many tack welds measure about 1/2 inch to 3/4 inch long, but the right length depends on the material and joint. Use enough weld to hold alignment without making a large lump that affects the final pass.
Should You Grind Tack Welds Before Final Welding?
You may need to grind a tack if it has cracks, poor fusion, contamination, or excess buildup. If the tack is clean, sound, and placed in the weld path, the final weld can often consume it.
Why Do Tack Welds Crack?
Tack welds can crack from too much heat, poor fit-up, dirty metal, fast cooling, or the wrong filler. Fix the cause before final welding so the defect does not carry into the finished joint.
Conclusion
A tack weld keeps your parts aligned before the final weld locks the joint in place. Use it to align joints, control distortion, and confirm fit-up before you commit to the full seam.
Keep each tack clean, small, and placed with purpose. Check the joint before final welding so you can fix gaps, cracks, or poor fusion early.
When you control heat and placement, tack welding gives your assembly a steadier start and a cleaner final weld.


